ROS2 Tutorial 1: Running the Turtlebot3/Nav2 demo
This tutorial shows how to install an implementation of the ROS2 Navigation2 tutorial by Microsoft with Vortex Studio as the simulation software, replacing Gazebo. The original tutorial from Microsoft can be found here : https://ms-iot.github.io/ROSOnWindows/ros2/nav2.html.
Prerequisites
✔️ Visual Studio 2019 with Desktop development with C++ workload included.
✔️ Chocolatey package manager installed.
✔️ Git source control software installed.
✔️ Vortex Studio 2021b
Installing and running demo
Installing ROS 2 on Windows
- From the start menu, look for x64 Native Tools Command Prompt for VS 2019.
- Open the command prompt as administrator.
Run the following to install ROS 2 Foxy.
mkdir c:\opt\chocolatey
set ChocolateyInstall=c:\opt\chocolatey
choco source add -n=ros-win -s="https://aka.ms/ros/public" --priority=1
choco upgrade ros-foxy-desktop -y --execution-timeout=0
Open a Developer Command Prompt
- From the start menu, look for x64 Native Tools Command Prompt for VS 2019.
- Run the shortcut as administrator.
Once the developer command prompt is open, run
::Make sure this corresponds to your Vortex Studio version
set PYTHONPATH=C:\CM Labs\Vortex Studio 2021b\bin;%PYTHONPATH%

:: activate the ROS 2 environment
c:\opt\ros\foxy\x64\setup.bat
Create a Navigation 2 Workspace
From https://ms-iot.github.io/ROSOnWindows/ros2/nav2.html
Create a empty workspace to contain the Navigation 2 project, and then resolve the additional dependencies.
:: create a empty workspace
mkdir c:\nav2_ws\src
pushd c:\nav2_ws

:: copy turtlebot3_vortex from the tutorial folder to \src
Xcopy "C:\CM Labs\Vortex Studio 2021b\tutorials\ROS2\turtlebot3_vortex" "C:\nav2_ws\src\turtlebot3_vortex" /E /H /C /I

:: checkout the required source code.
curl -o nav2.repos https://raw.githubusercontent.com/ms-iot/ROSOnWindows/master/docs/ros2/navigation2_foxy.repos
vcs import src < nav2.repos

:: build the workspace
colcon build

:: activate it
install\setup.bat
Launch Cartographer Node and Save Map
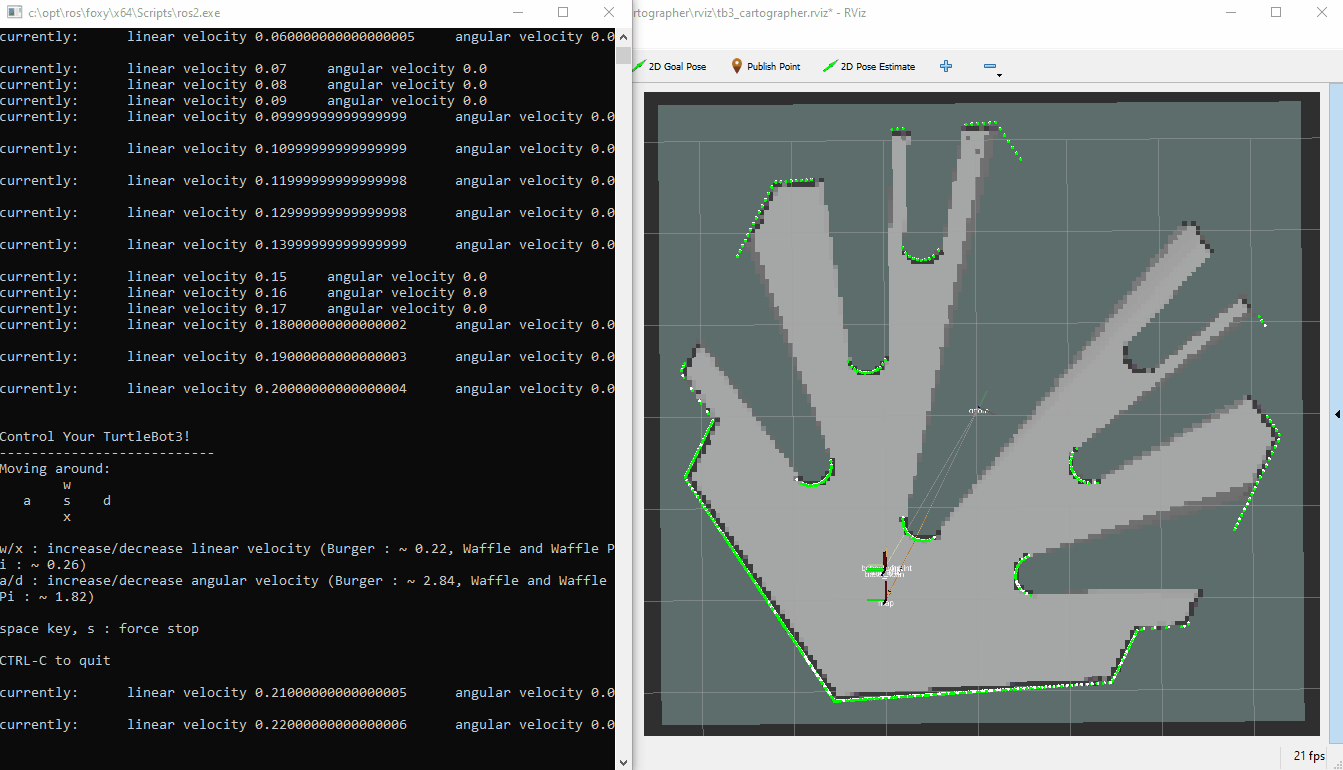
Launch the Cartographer, Vortex Turtlebot3 and Teleop nodes.
::teleop needs to know which turtlebot model is loaded
set TURTLEBOT3_MODEL=burger

::Include Vortex Studio Python libraries. Make sure this is your installed Vortex Studio Version (2021b and newer)
set PYTHONPATH=C:/CM Labs/Vortex Studio 2021b/bin;%PYTHONPATH%

start ros2 launch turtlebot3_cartographer cartographer.launch.py
start ros2 run turtlebot3_teleop teleop_keyboard
start ros2 run turtlebot3_vortex turtlebot3_vortex
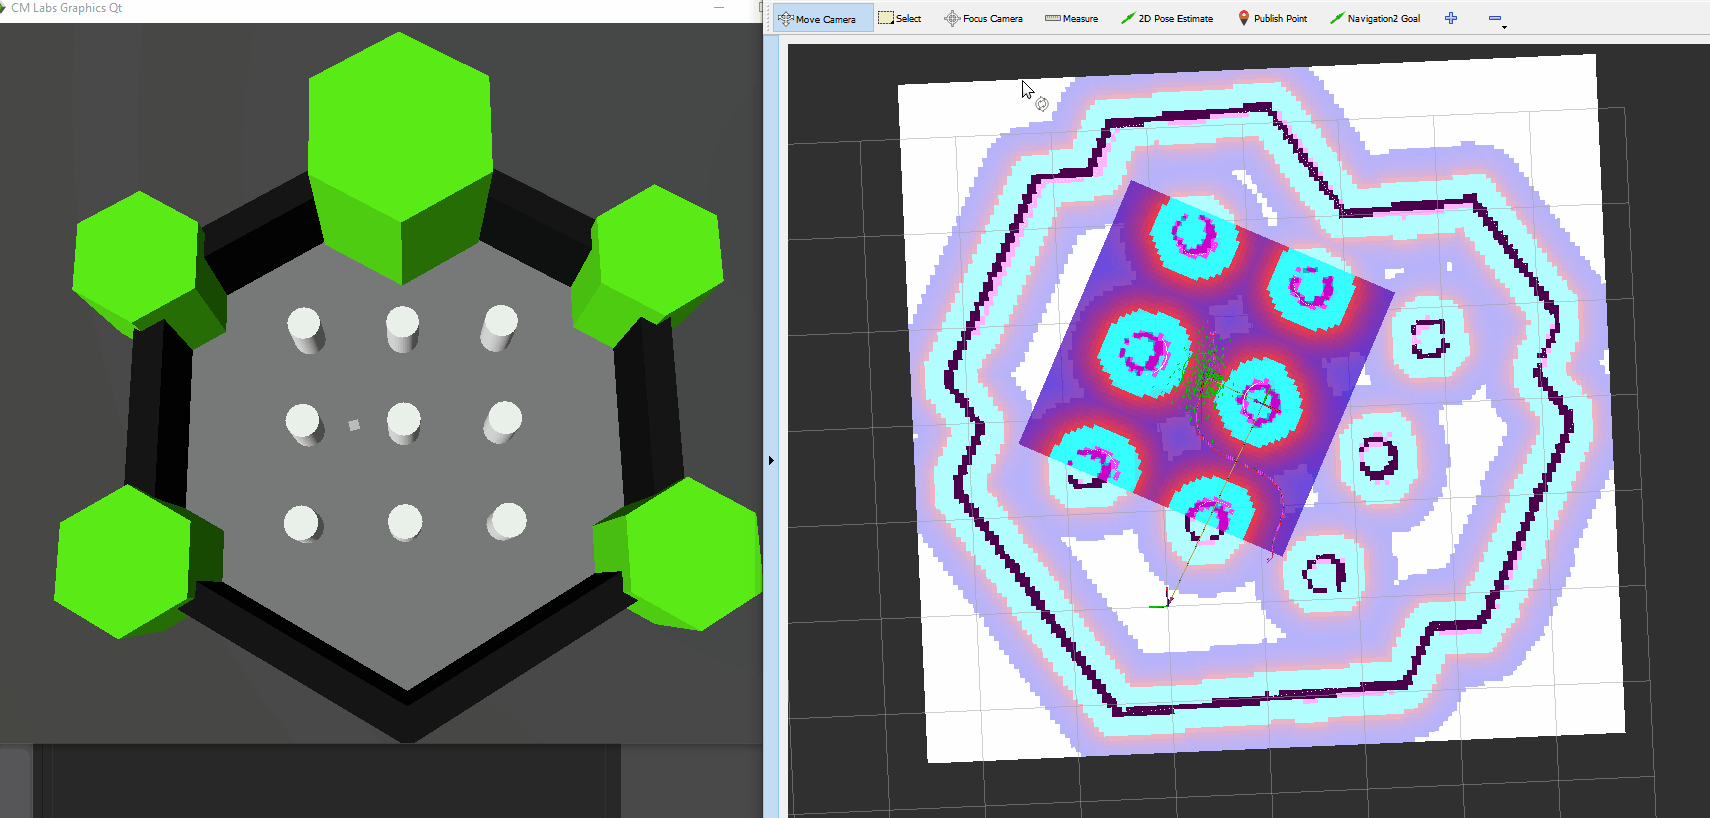
Using the teleop_keyboard node, navigate through the map until it's well defined.
Save the map using map_server
ros2 run nav2_map_server map_saver_cli -f map
- Close all nodes, keeping the developer command prompt open.
Launch Navigation2 with Vortex TurtleBot3
Launch the Vortex simulation and the Navigation2 algorithm
start ros2 run turtlebot3_vortex turtlebot3_vortex
start ros2 launch turtlebot3_navigation2 navigation2.launch.py map:=c:\nav2_ws\map.yaml
After a few moment, you should see TurtleBot3 in a simulation world and the respective map shows in RViz. You can use 2D pose in RViz to give a estimate location to intialize your robot, and use 2D goal to see Navigation 2 planning a path in action.
Details on contents and workflow
In this section, we're going to take a closer look at the workflow used to create this demo. This should provide more details into the best practices of Vortex Studio simulation with the ROS2 eco-system.
Package Structure and Topic list
As shown in the infographic below, we're using a mix of Python scripting and C++ Extensions (plugins) to interface the Vortex Studio Simulation of the Turtlebot3 with the ROS2 Nav2 stack.
In theory, the Python API allows for complete integration of Vortex with ROS2. For some messages like TF2 and PointCould2, Python has performances issues (mainly because of the conversion of the data) and using C++ is preferred. Vortex Studio 2021a now comes packaged with extensions that can automatically publish PointCloud2 (from a Lidar extension) and TF2 messages (from part transforms).
In this tutorial, we are using a Laserscan message with Python instead of a PointCloud2 message. This yields acceptable performance because a Laserscan only has one channel, where as PointCloud2 can output multiple channels for a single Lidar Sensor.
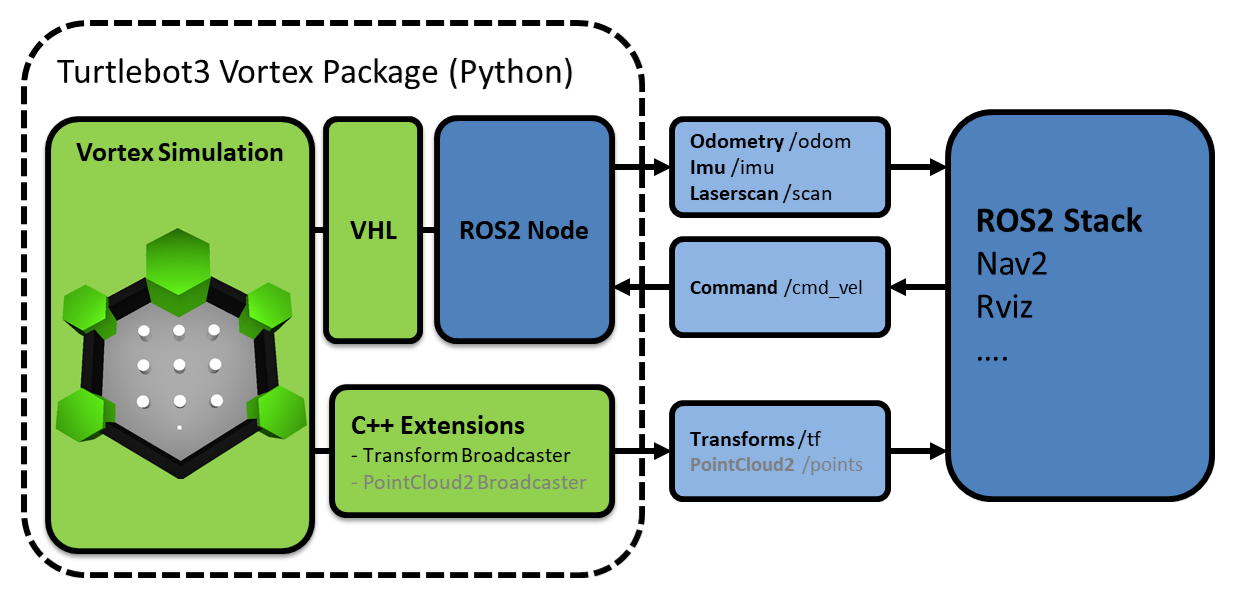
The turtlebot3_vortex node is a Python script that:
- Launches a Vortex Application
- Loads the turtlebot3_scene.vxscene (Environment) and turtlebot3_burger.vxmechanism (robot) into the Vortex Application
- Creates subscription for /cmd_vel (input controls of the robot) and feeds it to the turtlebot's VHL (Vortex High Level) interface
- Creates publishers for /odom, /Imu and /scan, with data extracted from the turtlebot's VHL
The turtlebot3_burger.vxmechanism contains C++ Extensions (plugins) that:
- Create a publisher node for /tf (TF2 transforms)
- Read the transforms of the robot's parts and convert the coordinates into a TF2 message
- Exposes data into a VHL (Vortex High Level) interface
This mechanism also contains the logic need to drive the robot from the cmd_vel message.
The turtlebot3_scene.vxscene file contains the environment in which the robot can drive.