How to set up a Unity-Vortex simulator with the Console
This document explains the various steps necessary to use the Vortex Console in tandem with a Unity application integrating Vortex.
Required Installations
First of all, the correct version of Vortex needs to be installed in order to use those features. Vortex Studio 2020b must be installed.
Configuring the Nodes via the Setup File
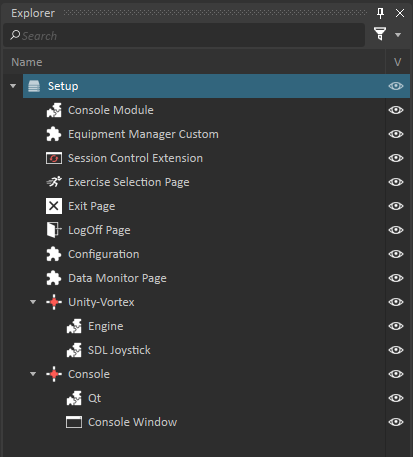
- There should be a node for the Unity-Vortex application, which contains the Engine, and other modules like controls and Earthworks. This is the master node.
- There should also be a node for the Console, which contains the Qt module and a Console Window extension.
- All other modules and extensions can be at the root, such as the Console module and all usual Console Pages including the Exercise Selection Page, the Exit Page and the LogOff Page.
- Record and Playback features are not supported with the Vortex Integration in Unity. This means that the Control Record and Playback parameter of the Console Window must be turned off.
- As in other multi-nodes simulators, some other extensions are also required, such as the Console's Session Control extension, the Network Configuration and Network Data Monitor.
- The "Equipment Manager" extension needs to be replaced by the "Equipment Manager Custom" extension from the Vortex Integration Plugin.
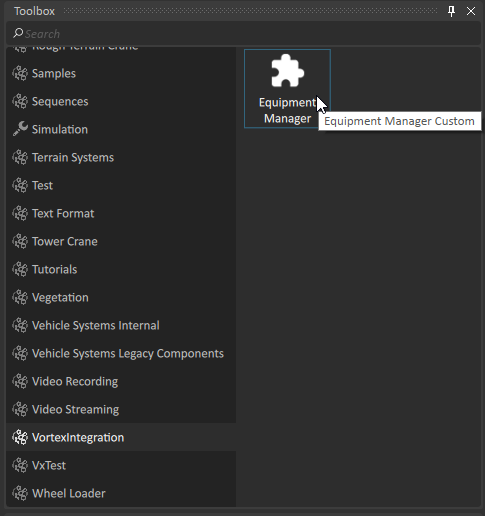
- This extension will let Vortex know that it should load content from Unity on the master node, instead of the usual Vortex content.
- The "Assets Base Path" parameter of the Console Module must be set properly to a directory containing a Scenario folder and an Equipment folder, where the exercise and equipment files should be kept, respectively.
All other assets should be part of a build of the Unity application. - Additional note: A similar setup is also possible on a single node.
Associating a Unity Scene to an Exercise
To load an Exercise in Unity, a Unity scene should be associated to it. This can be done in the Vortex Editor, via parameters for an Exercise of an Exercise List (vxexercise).
- First, set the scene's Type to "Custom".
- Then, set the Scene Name to the name of your Unity scene (name only).
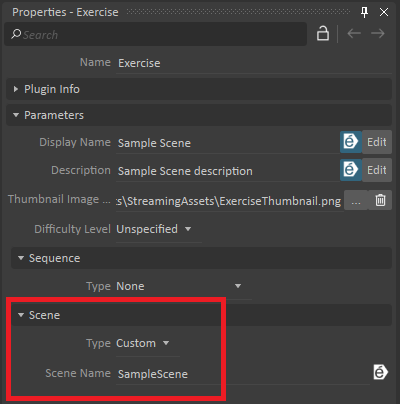
Note: Sequences are not supported the the Custom Scene Type, so the Sequence Type should be set to None.
Adding an Equipment
In order to use the Exercise List, the Console needs an Equipment (vxequipment).
Setting the Default Scene
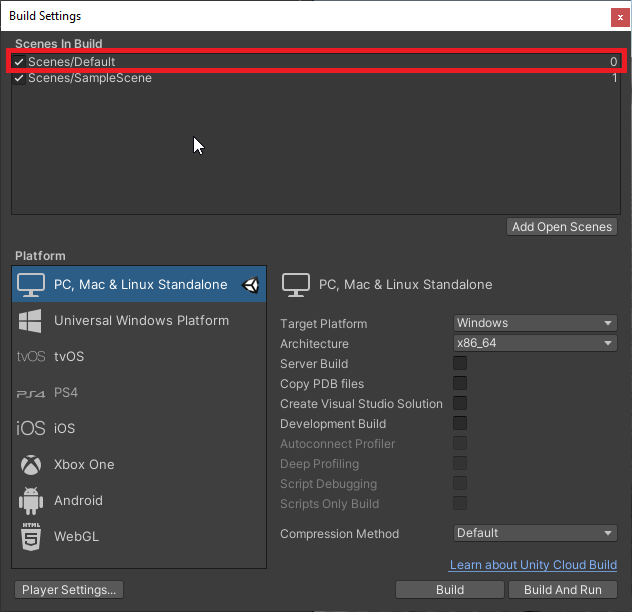
A default scene must be set in your Unity-Vortex application. This scene will be open before an exercise is selected and loaded, and after it is stopped.
The default scene is simply Unity's default scene, which means it is the scene at index 0 in the project's build settings. Ideally, it should be a simple scene that is practically empty, except for something like a background color or logo.
Setting up the Unity Build in the Director
When setting up the simulator via the Director, make sure to select your setup file, and add the 2 nodes mentioned earlier. For the master node (Unity-Vortex), you must select the executable file from your built Unity application.
To do this, click the cell in the "Executable" column for this node, then click "Browse" and select your exe file.

You should then be able to launch the simulator running a Vortex simulation in a Unity application, with the Console allowing you to select your Equipment and Exercises as usual.