Scene Tutorial 4: Adding Lighting
This module focuses on adding and modifying lighting in a scene to improve visibility and overall scene aesthetics.
Prerequisites
You need to have Vortex® Studio and the Vortex Studio Demo Scenes installed to be able to follow all steps in this tutorial.
Exploring Lighting Options
- Open EngineeringParkour.vxscene from "...\CM Labs\Vortex Studio Content <VERSION>Demo Scenes\Scenario\Engineering Parkour".
- Save the scene as a new file named "LightingTutorial.vxscene", as to not overwrite this file.
- In the Properties of the Skybox (located under the Lights folder), change the Hour value to 0 to make it night time (midnight)
In the Explorer, under Lights, add an Ambient light to the scene.
Ambient Light Ambient lights illuminate the entire scene the same amount, akin to sunlight illuminating the entirety of a given area on a sunny day.
- In the Properties of the Ambient light, change the color to a light-blue using the color spectrum selector.
- Change the Intensity of the light to 100. Notice how bright the entire scene becomes blue. Change the Intensity value to a more realistic value of 2.
- Select the Ambient light and delete it from the scene.
- Now, from the Explorer, under Lights, add a Spot light to the scene.
Move the spot light upwards such that the Local Transform is 0, 0, 3 m.
Spot Light Spot lights illuminate in a cone shape in the direction the light is pointing in. The spotlight can simulate anything from a laser pointer to a pot light.
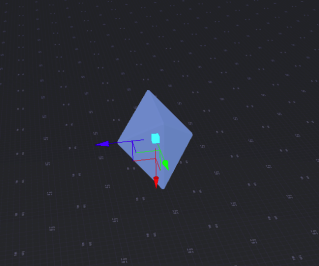
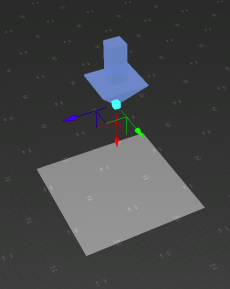
- In the Properties of the Spot light, change the Outer Distance to 2.9 m. Notice that the Spot light no longer illuminates the ground; this is because the "radius" of the light does not reach any surface to bounce off.
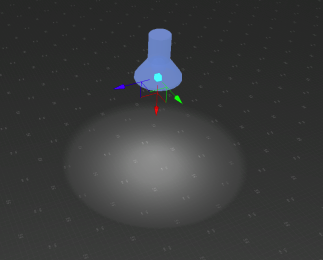
- In the Properties of the Spot light, change the Outer Distance to 5 m.
- Now, change the Inner Distance to 0.1 m. Then, change it to back to 2 m. Notice how the light becomes seemingly brighter when you come back to 2m. That's because the Inner distance determines at what distance the light begins to fade from the origin of the Spot light.
Finally, modify the Inner and Outer Aperture values, (typically between 0 and 180) and observe the effects. This value modifies the angle of the spotlight's inner and outer radiuses, respectively.
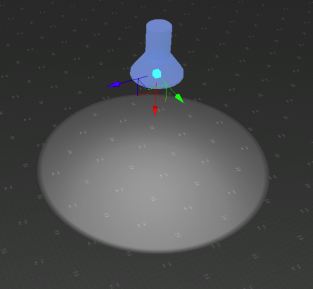
Inner Aperture: 45.0 deg
Outer Aperture: 46.0 deg
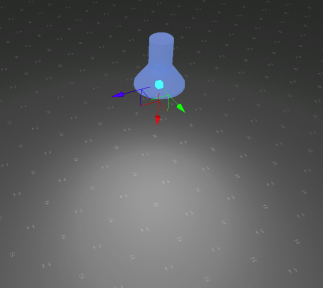
Inner Aperture: 0 deg
Outer Aperture: 65.0 deg
- Select the Spot light in the Explorer and delete it from the scene.
- Now, from the Explorer, under Lights, add a Directional light to the scene.
- Move the Directional light upwards such that the Local Transform is 0, 0, 3 m.
Change the Beam Width to 2 m.
Directional Light Directional lights act similarly to a Spot light, except they output light in a square or rectangular shape. Also, they project light infinitely far. This is primarily useful for lighting interior rooms evenly, or projecting textures onto the ground.
- In the Properties of the Directional light, hover over Projected Texture, and click on the three dots. Next, click the other three dots symbol to bring up the "Select Projected Texture" window.
- In the Explorer, type "0_UV_ObstacleBumps" in the Search box and select the first one in the list.
See how this texture is projected onto the ground with some transparency, as if projected through a lens.
Using a projected texture on a finite directional light that covers the whole scene is a resource-efficient way to “bake” together multiple static lights, such as lamp-posts.
- Once again, click on the three dots next to Projected Texture in Properties, and click on the trash can to remove the Projected Texture.
Finally, still under Properties, change the Beam Aspect Ratio to 10. Now, change the value to 0.1. Observe the differences between each value.
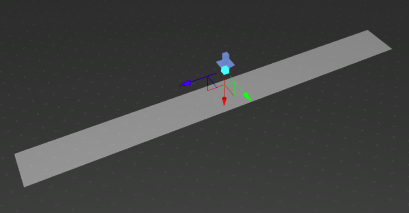
The Aspect Ratio is the ratio between the width and the height of a rectangle. So, an aspect ratio of 0.1 means that the width is 0.1 times the height of the rectangle. An aspect ratio of 10 means that the width is ten times the height of the rectangle, and so forth.
- Remove the Explorer search text, select the Directional light and delete it from the scene.
Now, from the Explorer, under Lights, add a Point light to the scene.
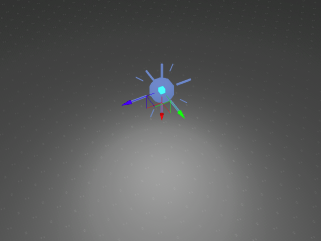
Point Light Point lights, are similar to a Spot light, except they emit light equally in all directions.
- Move the Point light up and down and notice how it emits light from a small point source in all directions.
- Select the Point light in the Explorer and delete it from the scene.
- Now, from the Explorer, under Lights, add a Halo light to the scene.
- In the Properties, change Halo Sprite to Starburst 1, and change the Intensity to 20.
Additionally, uncheck the Directional box in the Halo Properties.
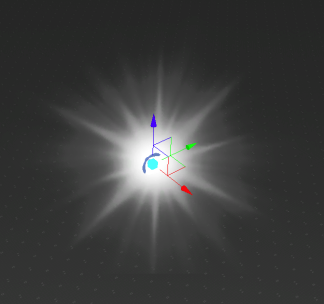
Halo Light Halos are meant to be attached to spots or points lights to simulate the halo effect that can be seen when you're looking at a light head-on. By turning off the Directional property, we can see it from all angles. When Directional is enabled, we can only see the halo when looking at the emission point from a specific direction. You can see it it you check it back on and rotate the camera around the halo object.
- Let's add one more star to the sky in the scene. In the Properties of the Halo light, double click on the right-most white square next to Color. In the color spectrum, use your judgment to select a yellowish-orange.
- Change the Local Transform of the Halo light to 0, 0, 60 m.

- Pan the camera upwards and check out the bright new star that has appeared in the sky! This is one of many uses for the Halo light, in addition to being used as car headlight glare, signal flares, and much more.