Simulator Deployment Tutorial 4 : Multiple Viewports on a Single Screen
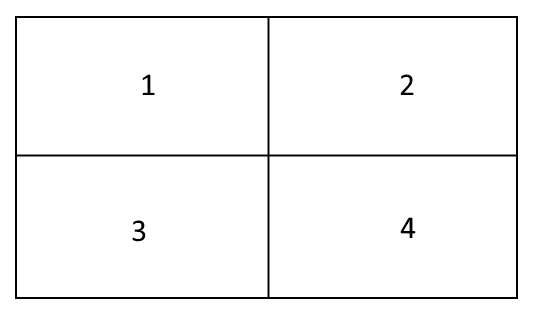
This step-by-step tutorial explains how to deploy a simulation with multiple cameras displayed on a single screen, as depicted in the image below:
Prerequisites
You need to have Vortex® Studio and the Vortex Studio Demo Scenes installed to be able to follow all steps in this tutorial.
Configuring Cameras and Viewport Mappings
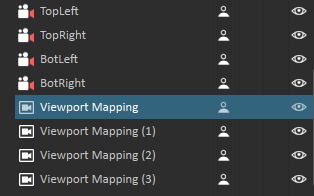
- In the scene, create four cameras and name them as follows :
- TopLeft
- TopRight
- BotLeft
- BotRight
- Add four (4) Viewport Mappings.
- In each of them, Assign the Viewport Name and the Camera Name to one of the four cameras.


These cameras can be of any type. You can also name the viewports and the cameras differently, but you have to modify the Viewport Mappings accordingly.
Configuring the Setup File
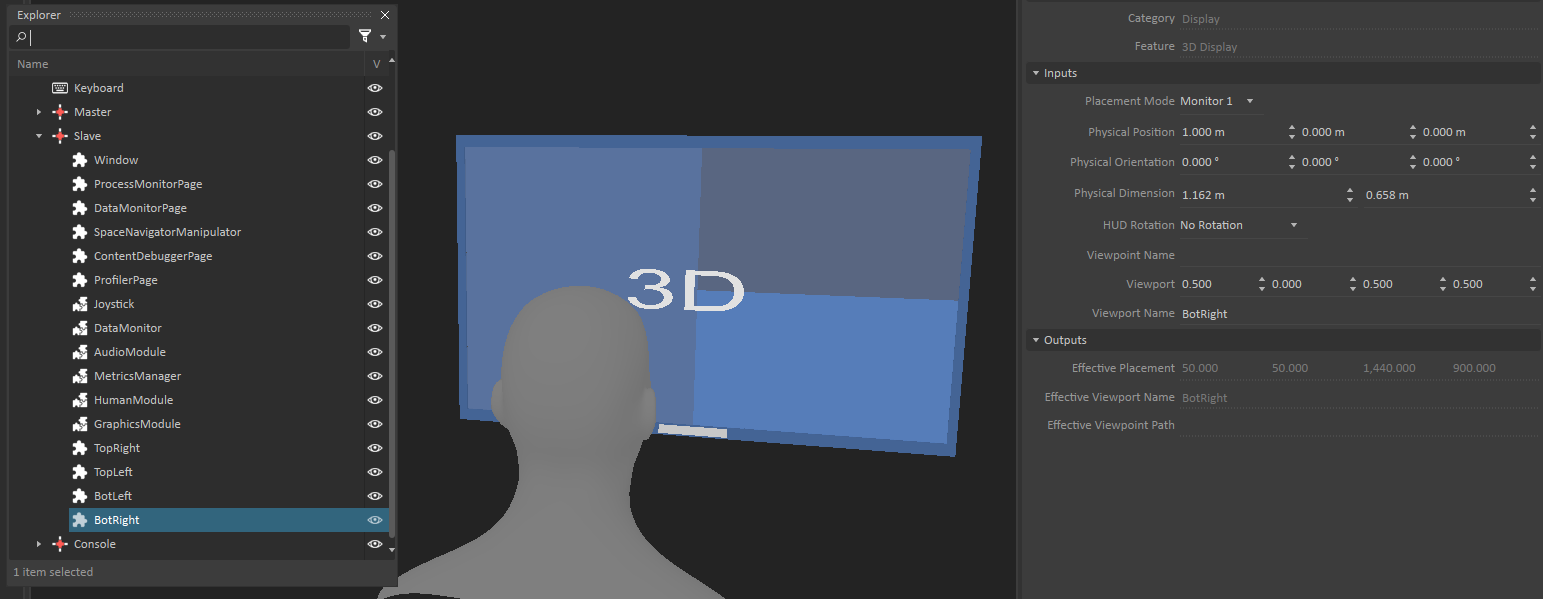
- In the Slave node (or the node with the graphics module) of your setup file, add four Windows.
- For clarity, rename the Windows as follows:
- TopLeft
- TopRight
- BotLeft
- BotRight
- Access their properties and modify those values :
- Placement Mode : Monitor 1 (or any other monitor; but they must all be set to the same one).
- Viewport :
- TopRight : [0.5, 0.5, 0.5, 0.5]
- TopLeft : [0, 0.5, 0.5, 0.5]
- BotLeft : [0, 0, 0.5, 0.5]
- BotRight : [0.5, 0, 0.5, 0.5]
- Viewport Name :
- TopRight : TopRight
- TopLeft : TopLeft
- BotLeft : BotLeft
- BotRight : BotRight
Running four cameras in one viewport on a single system will definitely be slower than just having 1 camera. It is similar to having many mirrors in your content since several different camera angles need to be rendered.
Alternatively, each camera could be rendered on separate computers, and then put everything together onto 1 display using special hardware.