Installing the Vortex Studio Package in a Unity Project
To use Vortex assets with Unity graphics on a distributed simulator, the Vortex Studio Package for Unity is required. It includes tools for packaging and testing Vortex graphics assets (such as Graphics Galleries and Graphics Splines) via the Unity Editor.
Installing the Vortex Studio Package involves downloading the package and copying the file to a folder with a path relative to your Unity project.
Prerequisites
To use the Vortex Integration in Unity package, you must have Vortex Studio 2021a and Unity 2020.3.11f1.
The Vortex Integration tarball package can be found in the Vortex Studio 2021a installation directory, under C:/CM Labs/Vortex Studio 2021a/bin/unity/com.cmlabs.vortex.integration-2021.1.0.tgz (or corresponding build version).
IMPORTANT: You must have a valid Unity user account and license to download the Unity Engine and use it.
To begin, you need a Unity 2020.3.11 project. We recommend using the Unity Hub to install Unity 2020.3.11 and to create a project in this version.
Installing the Package
To use the Vortex Studio package for Unity, there are two options:
- The first one is the recommended option, especially for teams of users working on the same Unity project from different computers. This is because it relies on a relative path to the Vortex Studio Integration Package file.
- The second one is more manual in how the package is installed. It relies on an absolute path to the Vortex Studio Integration Package file.
Method #1 (recommended)
Manually add a dependency to the Vortex Studio package as a relative path (this is the recommended approach).
- Get a copy of the Vortex Studio package for Unity mentioned earlier on your local computer and put it alongside your Unity project (not under the Unity Project's root folder). Please note that it can be anywhere, as long as you can refer to it with a relative path (same drive for instance).
- Make sure your Unity Project is closed.
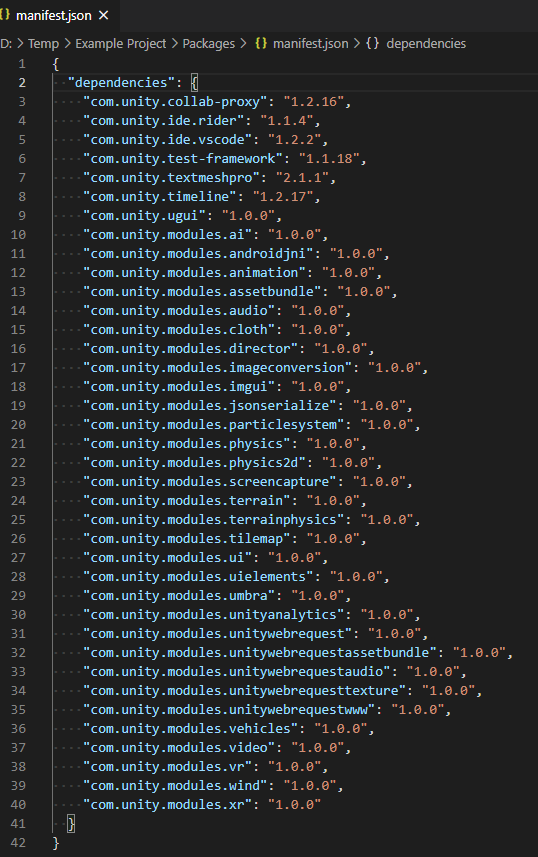
- In a Windows explorer window, navigate to your Unity Project's location and open the "manifest.json" file under the "Packages" directory.
- Here is the default content of this file:
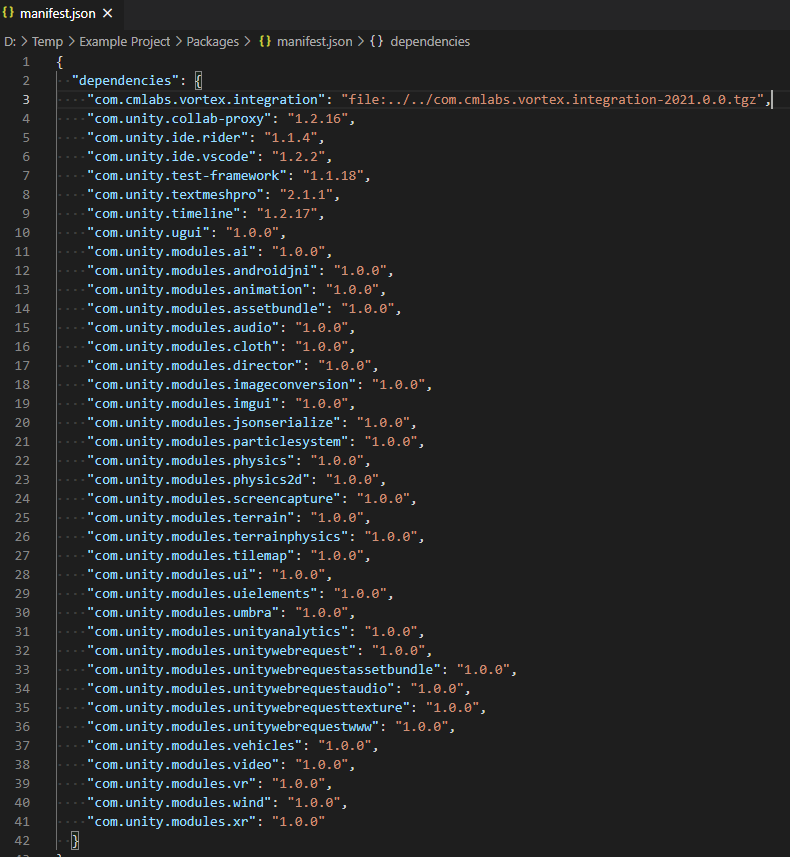
Add the following line to this file (as the first element) and save the file:
Please note that the path is relative to the "manifest.json" file.
Use the exact name of your tgz package file, which should match your Vortex Studio version.
- Open your Unity project again.
- In the Unity Package Manager window, make sure to select "In Project" from the dropdown menu directly under the Package Manager tab's name
- Validate that the Vortex Studio package is properly used by your project by opening the Unity Package Manager again.
- You should see it in the list.

Method #2
Use the Unity Package Manager to import the Vortex Studio package into your Unity project. This will create a reference with an absolute path (not recommended if multiple users will work on the same Unity project from different computers).
- Get a copy of the Vortex Studio package for Unity on your local computer.
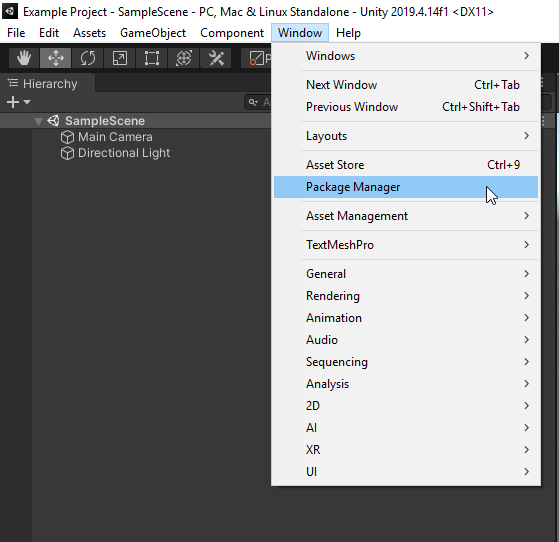
- Open the Unity Package Manager:
- Select the "Add package from tarball..." option:
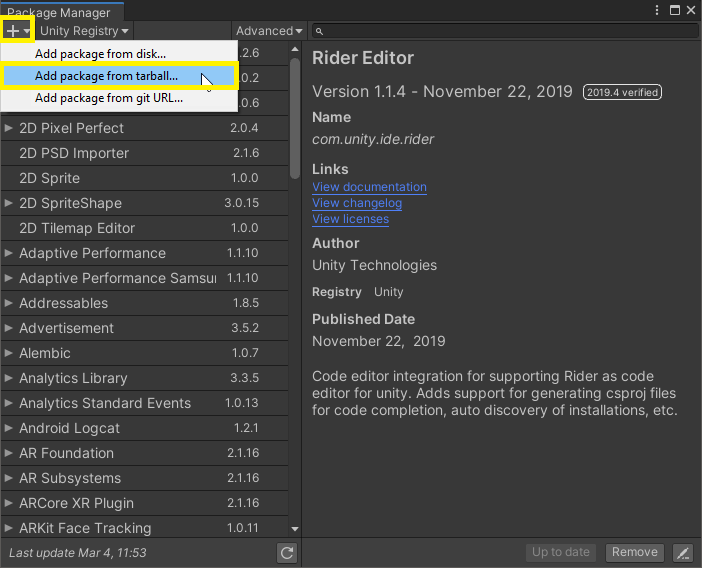
- Make sure to select the "In Project" tab of the package manager:

- Select the ".tgz" file of the installed Vortex Studio package for Unity. The Unity Package Manager should now show your new package:
You should now have access to Vortex tools for preparing and packaging graphics assets for a distributed Vortex simulation.