Simulator Deployment Tutorial 3 : Multi-Machine Simulation
Vortex® Studio allows the deployment of a simulation on multiple computers. This is useful when deploying a simulation on more than two screens, to spread the computing over multiple machines.
Prerequisites
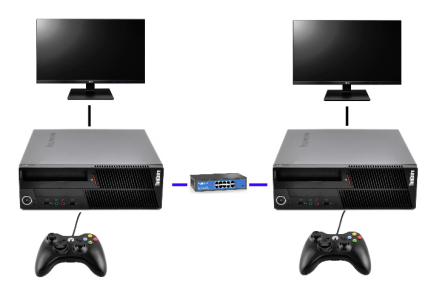
The simulation we will deploy in this tutorial will involve two computers connected in a network, each connected to a display and a gamepad controller.
You need to have Vortex® Studio and the Vortex Studio Demo Scenes installed to be able to follow all steps in this tutorial.
Both computers also need to have the same version of Vortex Studio installed.
Creating the Setup File
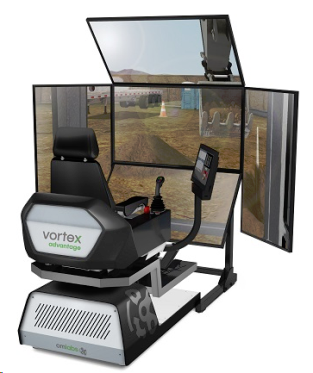
In this section, we are going to setup a configuration where one master node is running the engine, and two slave nodes are running graphics. We are also going to introduce seats, where one seat is going to correspond to the Excavator operator, and the other to the Dump Truck driver.
- From Vortex® Studio's main menu, create a Setup File from the New Document Section.
- From the Presets section of the Toolbox, insert a Master with dynamics preset and two Slave with 1 window presets.
- Rename the first seat Excavator Operator and the first slave node to "Excavator Node".
- Rename the second seat Truck Driver and the second slave node to "Dump Truck Node".

- Select the Excavator Operator Seat. Make sure that its Modules are located in the Excavator Node.
- Under the Preferred Roles section, add an entry and name it "Excavator.Operator".
Repeat for the Dump Truck Driver Seat and name it "Dump Truck.Driver".
The preferred roles correspond to [Parent].[Role] in the scene. In the case of the Excavator, the Parent is the Excavator mechanism and the role name is Operator.
- From the Content section of the Toolbox, add a Content Loader extension.
- In the Content Files section of its properties, add a file and browse to the mobile crane scene you modified in the previous section.
- Save the Setup File in your working directory and name it "Excavator Setup.vxc"
Deploying Simulation
Similar to what we did in the previous module, the Vortex Studio Director will be used to deploy the Nodes, this time on two different machines.
- Make sure both computers contain the assets (samples) in the same location with the same version of the scene.
Copy the Excavator Setup.vxc Setup File in the same location on both computers.
The following steps only have to be done on one of the two computers. This will be the computer from which the simulator is started.
- Open the Vortex Studio Director and create a new simulator. Name it "Excavator Simulator".
- In Selected Network, select the appropriate network adapter that connects both computers.
- In Setup File, browse and select the Excavator Setup.vxc we created in the previous section.
- Add three Simulation Applications by pressing the + button.
Assign the Master and Excavator Node to the first computer.
You can find out a Windows machine name by going into Settings/About (formally known as System), under Device Name.
- Assign the Dump Truck Node to the second computer.
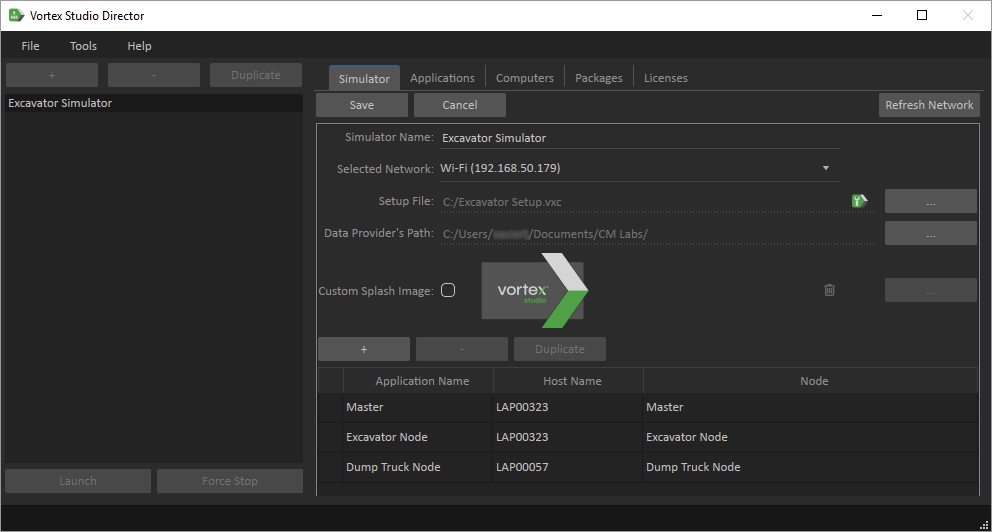
- Save and Launch the Simulator.