Graphics Galleries
The Graphics Gallery is a document type intended for:
- Artists to import 3D models from outside sources, and prepare and validate those graphics models for use in Vortex® Studio Editor.
- Engineers to manipulate imported models in Vortex Studio Editor. This eliminates the need to go back to a graphic artist, especially when dealing with CAD files, to make changes to the source 3D model and then re-import into Vortex Studio Editor.
- Adding terrain to a scene.
The advantage of having the graphics models in their own Graphics Gallery files is that they can be manipulated in Vortex Studio Editor independent of the mechanisms or scenes in which they are inserted. See the Model Simplification Tools topic for more information on how to work with these models.
Via the Graphics Gallery, you have access to the model's graphics nodes, graphics geometries, graphics materials and textures, allowing you to simplify the model by:
- Reducing the 3D model structure to just its moving parts
- Adjusting the model details to preserve an acceptable frame rate for real-time simulation
- Generating information needed for building the Dynamics model
Importing Models to Build a Graphics Gallery
In order to start building your graphical asset, you must import 3D models into a Graphics Gallery. The following 3D model file types are supported:
|
|
See Importing Models from 3ds Max for additional information.
To import a 3D model:
- If you have not already done so, create a new Graphics Gallery file (*.vxgraphicgallery).
- Select Graphics in the Toolbox.
- Double-click 3D Models...
- In the resulting dialog panel, browse to the required model and select it.
- Click Ok.
When any 3D model is first imported into the Graphics Gallery, its content is processed and a series of objects is generated from the source model. The following content is displayed in the Explorer:
- A Connection container showing parent-child relationships between graphic nodes within the gallery, and the gallery to its root nodes (viewable only, not available to edit)
- A hierarchical list of graphics nodes
- A flat list of graphics geometries
- A flat list of graphics materials
- A flat list of textures
When you import a subsequent 3D model to an existing Graphics Gallery, the new model's objects are added in the following way:
- The hierarchical list of graphic nodes is added directly to the gallery.
- The new connections associated with the newly imported model are added to the existing Connection container.
- The new graphics geometries, materials, and textures are added to their respective existing folders.
Importing 3D CAD Models
If you have the CAD Importer license installed, you can additionally import the following 3D CAD file types:
| File Extension | Tessellated models | BREP models |
|---|---|---|
| *.stl | ✔ | — |
| *.3dxml | ✔ | ✕ |
| *.stp, *.step | ✔ | ✔ |
| *.sldasm, *.sldprt | ✔ | ✔ |
| *.wrl, *.vrml | ✔ | — |
| *.catpart, *.catproduct, *.cgr | ✔ | ✔ |
✔ = Supported
— = This concept is not supported by this format
✕ = Not supported
Importing a CAD Model into a Graphics Gallery:
- If you have not already done so, create a new Graphics Gallery file (*.vxgraphicgallery).
- In the Graphics Galley, double-click 3D Models... in the Toolbox.
- In the resulting dialog box, browse to the CAD file you would like to import, then click Ok.
- A CAD File Import Options dialog box will appear. Set the following parameters:
- Up Axis: Sets the vertical axis used for the CAD file conversion.
- Unit: Sets the unit of length used for the CAD file conversion.
- Advanced
- Sag: Sets the maximum distance between the tessellation and the geometry.
- Maximum angle: Sets the maximum angle that is allowed between normals of two adjacent polygons from the same face (in degrees).
- Click OK.
Validation
The following features are available to validate models:
- Inspector : Provides information about the complexity of the Graphics Gallery and other Vortex objects.
- Daylight: Click to turn on the Daylight feature. Once clicked, you activate a simplified SkyDome extension with a slider controller to add environmental lighting based on time of day.
Visibility
There are a number of visibility tools available to help focus on specific regions of 3D models, especially when dealing with complex CAD models:
- Add or remove graphic nodes in the selection by holding CTRL and clicking on nodes (inverts the current graphic node selection state).
- Press SHIFT to shine a light from the user's point of view, attached to the perspective camera. When holding SHIFT and rotating the camera, the light will follow the camera and continue to shine in the direction the camera is facing.
- Additional tools are available through the right-click menu:
- Hide or Show Selected graphics nodes from the 3D view
- Show Only Selected or Unselected graphics nodes in the 3D view
- Show or Hide All graphics nodes in the 3D view
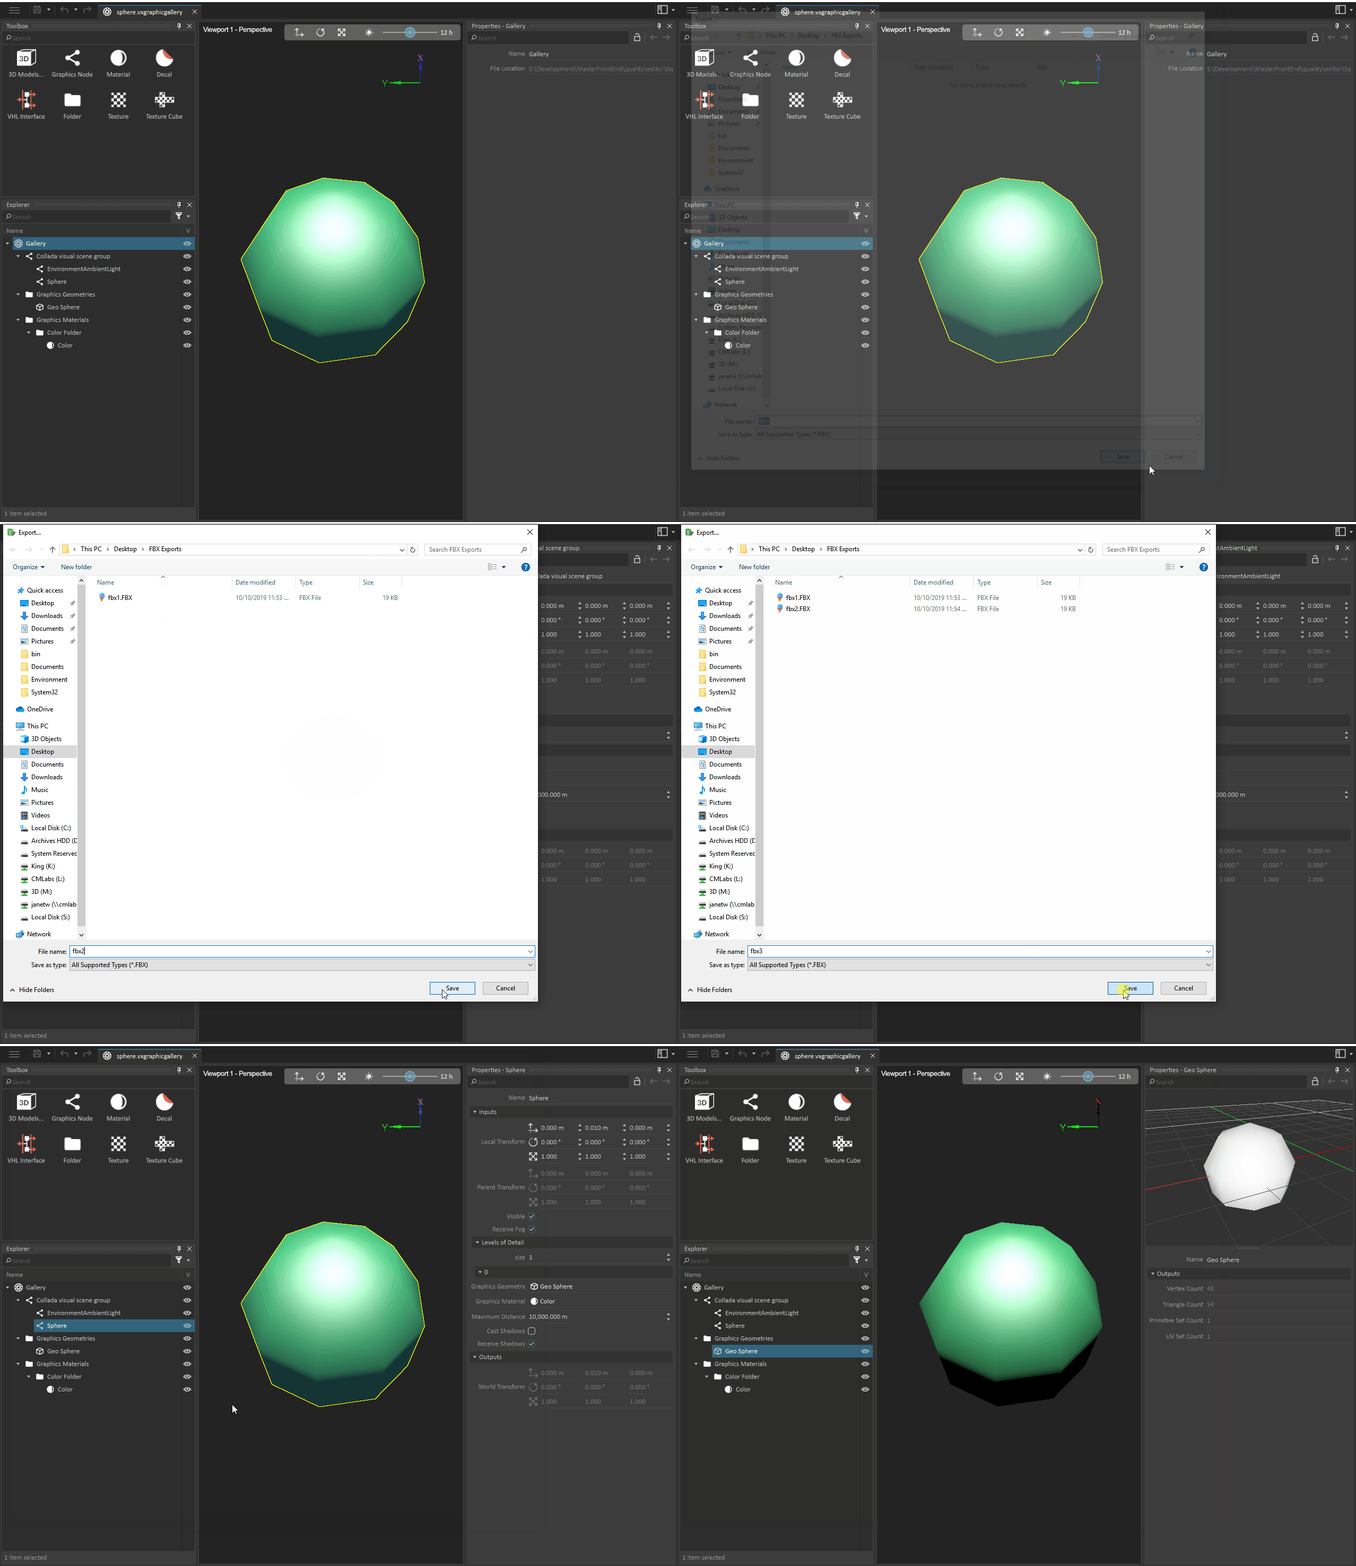
Exporting a Graphics Gallery as FBX
Export to FBX is available for the gallery, and for nodes and geometries of the gallery.
In the Explorer panel, select the object(s) you want to export. Right-click on any of these selections to access the action menu.
The Gallery Tools sub-menu includes the Export... option. Clicking on the Export... option prompts you to select the location and filename for the exported content.
Supported features of the FBX format and limitations
The supported features and recommended settings are documented in Importing Models from 3ds Max.
Additionally, PBR materials are currently not exported with the FBX file.
