CANopen Controls User Guide
- DEVOPS
Analytics
 This section offers information about deploying and validating an application that uses the 3rd party library
 ESACANopenPRO.dll.System Setup
To Prepare the System for CANopen Controls
To prepare the system for CANopen controls, to do the following:
- Download the PCAN-USB software package from the official PEAK System product page at the following URL: http://www.peak-system.com/fileadmin/media/files/usb.zip.
- Extract the archived files to a directory on the simulator node where you want to connect the hardware adapter.
- In the extracted files, locate and run the executable file named
PeakOemDrv.exe. - During the Custom Setup step of the installation, select only the following features for installation:
- CAN device drivers
- PCAN-Basic
- Connect the PCAN-USB to the computer.
- Connect a CANopen device to the breakout box.
CANopen Plugin
The CANopen plugin includes the CANopen module and multiple other devices.
| Extension | Default Node ID | Specification |
|---|---|---|
| HCMS8 | 0x49 (73) | HCMS8 |
| Bidirectional Analog Pedal | 0x64 (100) | Analog Pedals |
| Unidirectional Analog Pedal | 0x61 (97) | Analog Pedals |
| Digital Pedals | 0x3 (3) | Digital Pedals |
| Vortex Advantage Steering Wheel and Pedals | 0x30 (48) | Vortex Advantage Steering Wheel and Pedals |
Using Devices in the Setup
Important: Adding multiple devices with the same Node ID can cause a conflict in the system because both extensions are updated when a user presses a button or move a joystick. Also, settings for the device inputs (such as thumper or light) will not function correctly because both extensions feed the same device. Refer to the relevant specification.
- In the Editor, open the simulator setup document.
- Add the CANopen Module on the node you want to connect devices to (the same node identified in system setup).
Accept the default values in the CANopen modules:
Setting Instruction Fill Nodes Info Leave unchecked Baud Rate Unless otherwise specified, the CM Labs standard is 250 kbps Heartbeat Signal Lost Time elapsed before the system determines the heartbeat is lost. The system supports device swapping wile the application continues to run. Changing this setting can make the system less responsive when you swap devices. Debug Mode Setting for internal diagnostics only. Generate Devices Accept default setting. - Select the CANopen devices you want to add to the simulator:
- Add the device extension to the same setup node as the module.
- Validate the Node ID for the new device extension. Make sure each Node ID is unique. Refer to the relevant specification for the correct Node IDs.
- If your simulator supports multiple devices, make sure that each device appears in setup mode.
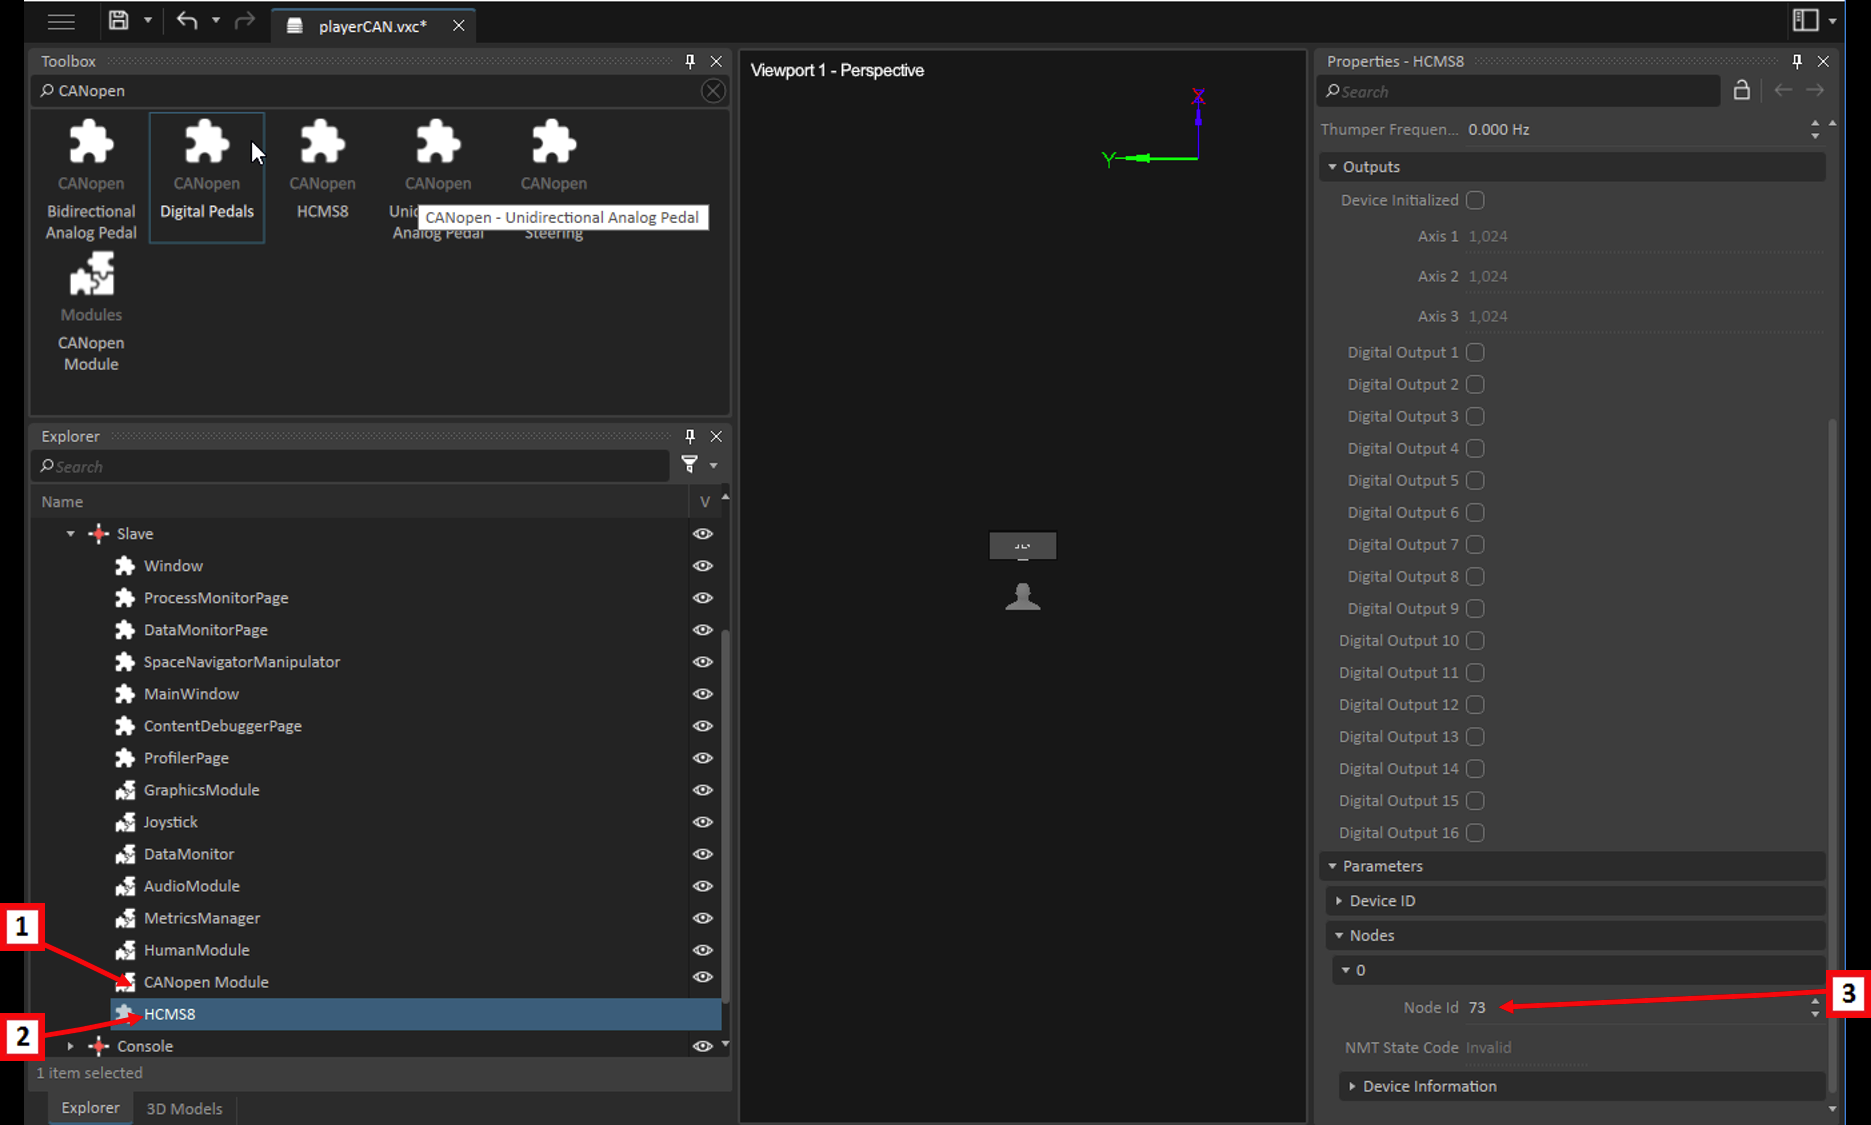
The following example shows the CANopen module (1) and device HCMS8 (2) with Node ID 73 (3).

For information about selecting devices for Tandem exercises, see Tandem Simulators.
Validating Devices
To validate that devices are mapped correctly, do the following:
- Start the simulator.
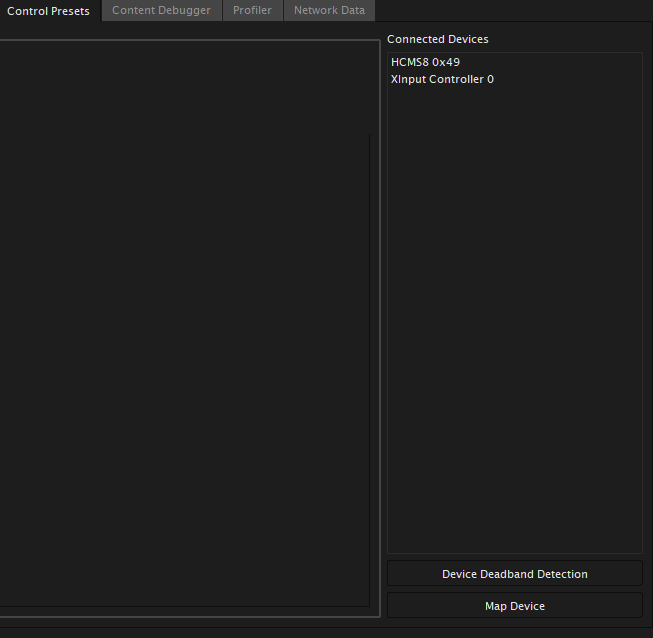
- Navigate to the Control Presets tab and verify that the device appears there. The list on the right should show the device type and Node ID.
In the following example, we added the extension HCMS8 and the CANopen module to the slave node of the player setup file.
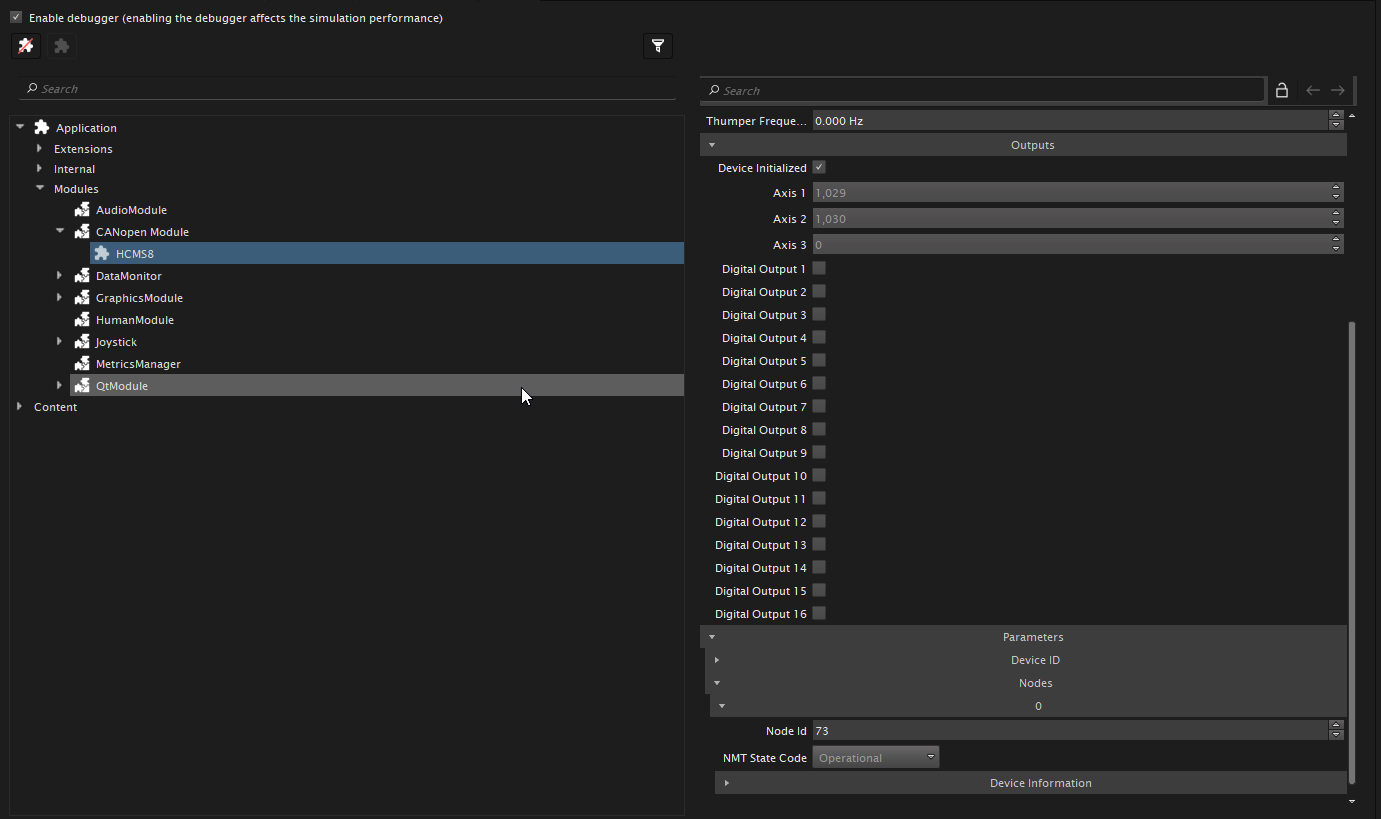
- In the Player interface, use the Content Debugger tab to view information about the state of each device. Make sure the initialized output field is set to true.
- If you do not see the extensions, or the field initialized is set to false, inspect the Error log. The system logs information when a node is active, and when the system fails to detect a heartbeat for a node.


Troubleshooting
| Problem | Steps for Resolution |
|---|---|
| I found my device but it is not working. | To show discovered CANopen devices or validate your setup file, run the Vortex application CANoScan from the computer with the PEAK-System device. Make sure that any other Vortex applications on the computer are not running before you start.
|
| I cannot find my device. |
|