Earthwork Systems Tutorial 1: Bucket & Blade Extensions
Earthworks Module 1: Bucket & Blade Extensions
In this tutorial, users will learn the various characteristics of soil that can be simulated with Vortex® Studio's earthworks physics.
Prerequisites
You must have Vortex Studio and the Vortex Studio Samples and Demo Scenes installed to be able to complete this tutorial.
Before starting this tutorial, we recommend you have the Getting Started Tutorials covered first.
Adding a Bucket Tool
Open ExcavatorWorkshop.vxmechanism (..Demo Scenes/Equipment/Excavator/Dynamic/Design/ExcavatorWorkshop.vxmechanism)
Note
This excavator has all of its parts, constraints, and collision geometries defined, except for its bucket and blade.From the Earthwork Systems section of the Toolbox, insert a Bucket.
- Under Parameters, change the Material to 'Bucket'.
- Assign the "Part" property to the Bucket part of the Excavator Assembly.

- Under Inputs, modify the Local Transform to these values :
- 0.800m, 0.000m, -0.350m
- -90.000°, 0.000°, -136.000°
- 1.000, 1.000, 1.000
- Under Parameters -> Shape Model, modify the following values :
- Blade Length: 0.7m
- Wall Height: 0m
- Width: 1.22 m
- Diameter: 1.1 m
Thickness: 0.100 m
Note
The values must be changed in the Shape Model parameters. The transform tools (Move/Rotate/Resize) cannot be used to change these values.
Adding a Blade Tool
- From the Earthwork Systems section of the Toolbox, insert a Blade.
- Under Parameters, assign the Blade part (Dynamics > Assembly > Blade) to the Part field.
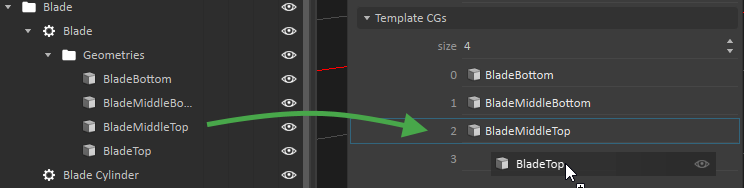
- Under Templade CGs, change the size to 4.
- Assign each blade Collision Geometries to each field.
- Save (Ctrl+s) the mechanism.