Backward Compatibility Tutorial
- DEVOPS
| Name | Location |
|---|---|
| ExBackwardCompatibility | <Vortex Studio Installation Folder>\tutorials\ExBackwardCompatibility |
This project is a plugin. It shows how to use the VxSim::IExtension callbacks related to serialization and backward compatibility
Serialization is supported natively for all extensions.
Fields Serialization
The default behavior is to save all fields, i.e. inputs, outputs and parameters, of the extension along with the main object that they are saved with into a file. For example, adding the extension to a mechanism will save the fields along the mechanism definition. Those fields are restored when the file is loaded.
Data Serialization
This behavior is usually sufficient for most implementation. In some cases, it might be necessary to save private data that is not in the fields.
In that case, IExtension provides 2 special callbacks.
IExtension::onSaving(): This callback purpose is to inject the private data needed to be able to load the extension correctly. You are provided with a stream to write into.IExtension::onLoaded(): This callback is called to restore private data to the extension. A stream is provided, it contains what was was during theonSaving(). The function also has a version number. It is the programmer's responsibility to know the content of the stream per version and restore it properly.
Backward compatibility
Every time you change your extensions in ways that serialization is changed, you might want to support older content file. In this case, the version of your extension should be increased and the callbacks should be implemented.
Versioning
Version is provided to IExtension constructor. By default the value is 0. When you change it, the next time the extension is saved, it will use that number.
The version number the data was saved with is provided in the callbacks when relevant.
Callbacks
When refactoring an extension, some fields may change, some are added, other are removed and so on.
For that use case, IExtension provides 2 callbacks.
IExtension::onLoading(): This callback is the main function to handle field changes. It is called with the data read directly from the file. The programmer can change the content of that data and update the extension based on the data loaded.IExtension::onRestoringConnection(): When a connection is being restored and a version changed is detected, this method will be called. This is the occasion to redirect the connection to the new field, or simply delete it.
Loading sequence
- Data is read from file
- Empty extensions are created with the default values. The hierarchy is restored.
IExtension::onLoading()is called on the extensions with the data read from file. This is the moment to modify fields and apply some changes- Data loaded from file (and potentially modified by
IExtension::onLoading) is copied to the extensions. IExtension::onLoaded()is called on each extension.IExtension::onRestoringConnection()is called.- The extensions are added to the application.
Classes
The following tutorial shows an extension with 3 versions, each version shows how to use those callbacks. Only is compiled based on the value of EXTENSION_VERSION in BCExtension.h.
- BCExtensionV0
- This is a simple extension with private data (Values a and b) and 2 outputs.
- Private data is generated randomly but is saved, so that when the extension is loaded, the randomness is no longer a factor
- Shows usage of
onSaving()anonLoaded()with private internal data
- BCExtensionV1
- This version exposes the internal data as input fields A B and C.
- The internal data do not need to be saved anymore thus
onSaving()is dropped. - Shows usage of
onLoaded()with private internal data of version 0. The internal values are set to the inputs A and B
- BCExtensionV2
- This version changes the input fields A B and C to Z, Y and X.
- The field C is reused as a constant and the output Version is dropped.
- Shows usage of
onLoaded()with private internal data of version 0. The internal values are set to the inputs Z and X - Shows usage of
onLoading(): copy the value of A, B and C to Z, Y and X. Value C is reset - Shows usage of
onRestoringConnection(): Redirects connection to/from A, B and C to Z, Y and X and drop connections from field Version.
See Backward Compatibility SDK documentation for more details about backward compatibility.
See Vortex Studio SDK - Customizing Vortex for information about making plugins.
See C++ Tutorial 1: Plugins for a detailed example of making a plugin.
Using the tutorial
This project defines a module and 3 versions of the same extensions.
Only 1 version of the extension and be used at any given time.
- Set the version of the extension to 0 by defining EXTENSION_VERSION to 0 in BCExtension.h.
- Compile the project.
- Deploy the plugin
- Launch the Vortex Editor.
- Add the Backward Compatibility module
- From the home page, click on Options
- Click on Setup
- In the Application Setup section, click on the Editor icon next to the editor.vxc file. This will open the setup document.
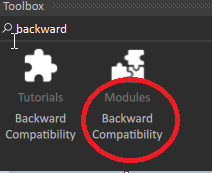
- In the toolbox, search for backward compatibility, and add the Backward compatibility module to the setup.
- Save the setup file
- From the home menu, create a new mechanism document.
- n the toolbox, search for backward compatibility, and a the Backward compatibility extension to the mechanism.
- Add dynamics script
- Create an input of type integer.
- Create an input of type double.
- Add a connection container extension.
- Connect the backward compatibility extension's output Result to the python script double
- Connect the backward compatibility extension's output Version to the python script integer
- Save the mechanism.
- Exit the editor
- In Visual Studio, change the EXTENSION_VERSION value to 1 at the line #56 of the "BCExtension.h" file and repeat step 2 to 4.
- Open your saved mechanism. Changes to the extension should be applied when loaded, new fields should shows up and connections should be valid.
- Repeat step 12 and 13 by using version 2 of the extension.