Vehicle Verification with Scripts
Developing a mechanism such as a wheeled vehicle requires constant modification of numerous components. Be it the engine, transmission, suspension, or tires, the parts of a vehicle must be put through repeatable, real-world conditions on a realistic terrain.
It is essential that the vehicle travels along the exact same terrain, test after test, in order to compare consistent results. These tests can easily be automated with Vortex® Automated Tests Platform (VxATP).
Running Scripts from the Vortex Studio Demo Scenes Directory
Vortex Test platform provides several tools to run specific or multiple tests (see Vortex Automated Test Platform). Encapsulating these tools in batch files allows any user to run multiple tests easily, without tampering scripts or executable files.
Two examples are provided in the Verification folder of the Vortex Studio Demo Scenes, found in your CM Labs installation folder.
Note The demo scenes must be installed at the same location as the Vortex Studio application (C:\CM Labs\) on your workstation.
Double-clicking on Vehicle_verification_LAV1_speed_launch.bat or LAV2_braking distance_launch.bat will execute the corresponding Python test script, and output the resulting logs and files in a specific folder labeled "Tests Results". The results are grouped in labeled folders, e.g., Run001, Run002, etc. There is also a batch file that will launch every script at the current location.
The batch files can be modified with a simple text editor to suit particular needs, such as the location of test scripts, the output path or any other parameter.
Vehicle Verification Using the Defense Vehicles
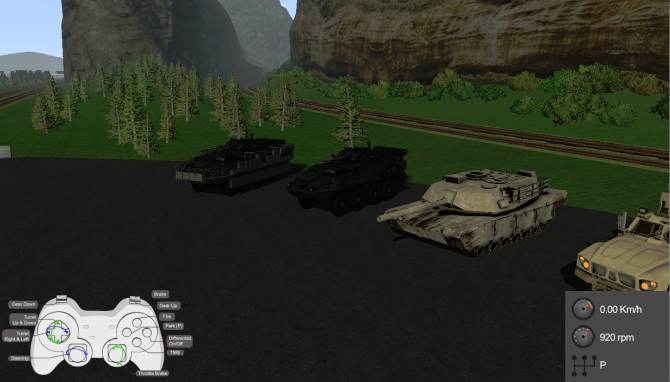
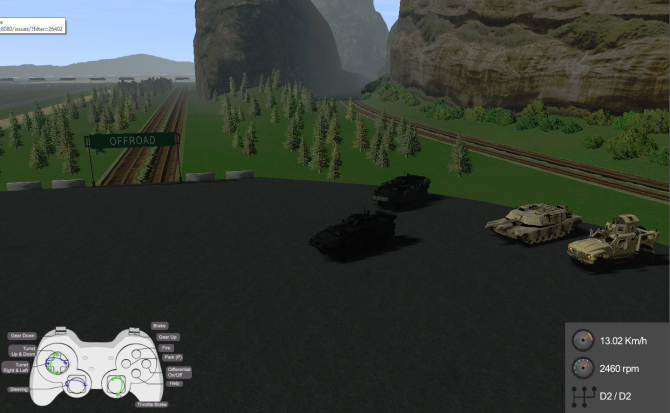
The first demo scene Python script shows how to interact with a vehicle in the defense vehicles demo scene using the Vortex API. You can find this scene in your Vortex Studio demo scenes folder (../Scenario/Defense Vehicles Scene/Defense vehicles.vxscene).
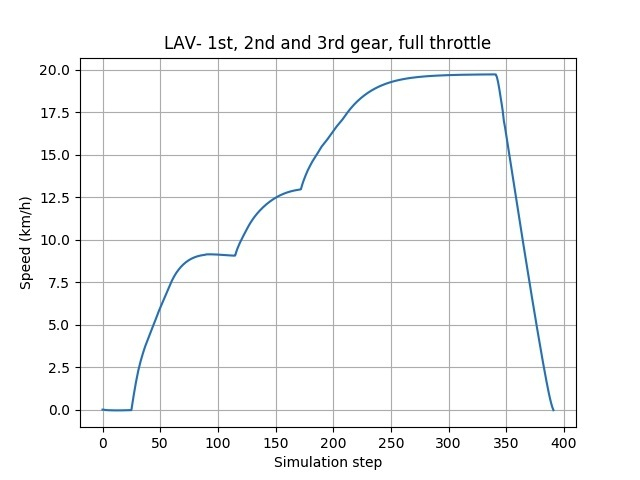
The purpose of this test is to drive the light-armored vehicle (LAV) in the first three gears of its automatic transmission, and record its speed at every step of the simulation. The script verifies that a certain speed has been reached in third gear.
A graphical representation of the results is saved at the end of the script.
| Initialization of script: Create an application,load a scene, find the vehicle |
|---|
def test_lav_scenario1(self): """ Create an application, load the demo scene and retrieve the vehicle's controls needed for the simulation """ application = VxATPConfig.createApplication(self, 'VxATP_vehicle_validation', VxATPConfig.getAppConfigWithGraphics()) vehicle_scene = application.getSimulationFileManager().loadObject('%s/../Scenario/Defense Vehicles Scene/Defense vehicles.vxscene' % self.directory) lav = vehicle_scene.findExtensionByName('LAV').toObject() self.assertIsNotNone(lav, "** LAV not found **") control_script = lav.findExtensionByName('LAV Driver Interface') self.assertIsNotNone(control_script, "** LAV driver interface not found **") |
The light-armored vehicle contains a Vortex High Level interface (named "LAV Driver Interface") whose inputs are connected to the transmission and engine via a series of scripts. These inputs can be used to control the vehicle directly. We first need to retrieve the ones that need to be activated, and set their proper values (in this case, the transmission's gear and engine's throttle).
Note that some updates of the application are needed in order for the values to be completely calculated through the various scripts:
| Assign vehicle's controls |
|---|
# Find the controls from the driver interface gear_up = control_script.getInput('Gear Up') throttle = control_script.getInput('Throttle') brake = control_script.getInput('Brake') speed = control_script.getOutput('Speed') current_gear = control_script.getOutput('Current Gear') application.update() |
The dynamics of the vehicle need to be taken into account during the execution of the script. Again, some updates of the simulation loop need to be executed depending on the vehicle's properties.
The vehicle's behavior needs to be verified at various points with assertions to ensure it responds properly:
| Execute simulation and report data |
|---|
""" Gather speed values at various gears during simulation and append them to a list """ lav_speed_list = list() # Engage transmission's first gear and set engine to full throttle gear_up.value = True throttle.value = 1 application.update() # Allow the vehicle to reach maximum speed in 1st gear for x in range(90): application.update() lav_speed_list.append(speed.value) # Shift to second, then 3rd gear. Interrupt 'Gear up' signal between each action gear_up.value = False application.update() gear_up.value = True application.update() gear_up.value = False application.update() gear_up.value = True # Let vehicle go forward for 250 steps. for x in range(250): application.update() lav_speed_list.append(speed.value) # Vehicle should be in 3rd gear self.assertEqual(current_gear.value, 'D3', "** LAV has not engaged third gear **") # Vehicle's speed should reach at least 18 km/hr self.assertGreaterEqual(speed.value, 18, "** LAV has not reach expected speed **") # Cut throttle, apply full brake throttle.value = 0 brake.value = 1 # Wait for the vehicle to stop completely while speed.value > 0: application.update() lav_speed_list.append(speed.value) # Create a graphical representation of the simulation data plt.plot(lav_speed_list) plt.grid(True) plt.title('LAV- 1st, 2nd and 3rd gear, full throttle') plt.xlabel('Simulation step') plt.ylabel('Speed (km/h)') plt.savefig('%s/LAV speed scenario 1.jpg' % self._config.output_directory) if __name__ == '__main__': vxatp_run_thisfile('.\Tests results') |
The resulting graph shows the data acquired during the simulation:
The second script uses the same setup process (creating an application, loading the defense vehicles scene, and extracting the LAV's information) but this time, we want to verify that the braking process of the vehicle stays within predefined limits of time and distance, given a certain variance. We thus verify two parameters of the simulation: the distance traveled by the vehicle until it stops, and the time (number of simulation steps) taken to do so.
| Vehicle braking distance verification |
|---|
# Set a maximum number of simulation steps for the LAV to reach top speed in third gear. # Top speed is considered achieved if the acceleration is below a certain value. # If the acceleration has not reached the minimum value within an expected interval of time, the test fails. counter = 0 while application.update(): counter += 1 speed_before_update = speed.value application.update() speed_after_update = speed.value if (speed_after_update - speed_before_update) <= 0.001: break if counter == 200: break # Top speed has been reached. Cut throttle, apply full brake, gather positions. x_pos_before_brake = getTranslation(lav_mech.outputWorldTransform.value).x y_pos_before_brake = getTranslation(lav_mech.outputWorldTransform.value).y throttle.value = 0 brake.value = 1 # Wait for the vehicle to stop completely. Verify that the vehicle stops within a 100 simulation steps. braking_counter = 0 while speed.value > 0: application.update() braking_counter += 1 self.assertLess(braking_counter, 100, "** LAV has not stopped within a sufficient period of time. Verify the vehicle. **") # Calculate the braking distance. For code simplicity, it is assumed that the LAV ascends both the x and y axis # on a flat terrain. x_pos_after_brake = getTranslation(lav_mech.outputWorldTransform.value).x y_pos_after_brake = getTranslation(lav_mech.outputWorldTransform.value).y delta_x = (x_pos_after_brake - x_pos_before_brake) delta_y = (y_pos_after_brake - y_pos_before_brake) # The test verifies that the braking distance does not deviate too much from an expected value (2.2 meters) # The result is printed in the log and, if successful, displayed at the end of the test. Otherwise the # verification fails. result = math.hypot(delta_x, delta_y) print 'Braking distance of the LAV:', result self.assertAlmostEqual(2.2, result, None, "** The LAV has not stopped in the expected distance. Verify the vehicle. **", delta=1) result_string = (str(result)) ctypes.windll.user32.MessageBoxA(0, result_string, 'LAV braking distance:', 0) |
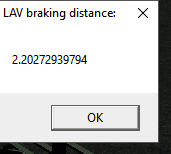
If the verification fails, the script is interrupted and declared failed. The successful result is displayed in a message box, as well as in the log of the test. This method of reporting is useful if you want the final result to remain on the screen after a long series of tests, without having to search through the logs.
Expanding Your Script: Vortex Scripting Best Practices
- Using a relevant application setup file: The automated script will run much faster if the 3D rendering is not used during simulation. If you do not wish to see the simulation on the screen, use a VXC file without a viewport (see
VxATPConfig.getAppConfigWithoutGraphics()). The mechanical computations are not affected by the 3D display. - Although a 'serializer' function is available in the Vortex toolkit, it is preferable to add objects (scene, mechanisms, extensions) to the application by using the simulation file manager class (VxSimulationFileManager()).
- A common error when handling inputs, outputs and parameters of an extension is to confuse the Vortex object and its actual value. The Python language will try to assign numerical or Boolean values to any type of variable, even a Vortex object, without explicitly warning the user, leading to unexpected behavior or errors during the execution of the script.


