Integrating Vortex Studio with Unity
- DEVOPS
 This information is intended for users of Vortex Studio and Unity who want to integrate Vortex Studio to existing simulation content in Unity, within a single process Unity integration. This integration SDK is useful for single process simulation, VR, and using advanced logic in Unity.
Pre-Requisites
You must be familiar with Vortex Mechanisms, Vortex Graphics Galleries, and the Unity Editor.
Introduction
With this integration SDK, Vortex mechanisms can be simulated just like any other assets in a Unity scene with the Vortex Studio Package for Unity; the Unity Editor lets you connect to parameters that you expose in Vortex Studio.
For distributed simulation and usage of all Vortex Studio features while Unity acting as graphics renderer and animation, see Using Unity as Graphics Renderer.
The following features are supported by this integration :
- Any Vortex Studio simulation parameter can be sent to a function in a Unity script (get/set), and included in your Unity scene.
- Vortex Studio automatically detects terrain GameObjects that you create in Unity around a Vortex vehicle. A corresponding height field is created and streamed in Vortex Studio at run time. To monitor contacts and collisions during simulation, you can show the height field at the same time, using the Vortex Studio Remote Debugger application.
- During simulation, Vortex Studio sends information about the position and orientation of each body to the Unity Engine. Parameters and outputs can be accessed via the mechanism's interface. To ensure smooth game play with accurate synchronization and realistic movements, Vortex Studio sends information about the position and orientation of each body to the Unity Engine. Parameters and outputs that you expose using a VHL interface let you control the Mechanism in Unity.
- Vortex Studio manages external devices, such as motion platform and CANopen-compliant devices for controlling vehicles and enriching the simulation.
Installing the Vortex Studio Package
Installing the Vortex Studio Package involves downloading the package and copying the file to a folder with a path relative to your Unity project.
See the prerequisites section of Creating Your First Project for more details.
Vortex Studio 2021a supports Unity 2020.3.11f1
Running a Sample Project
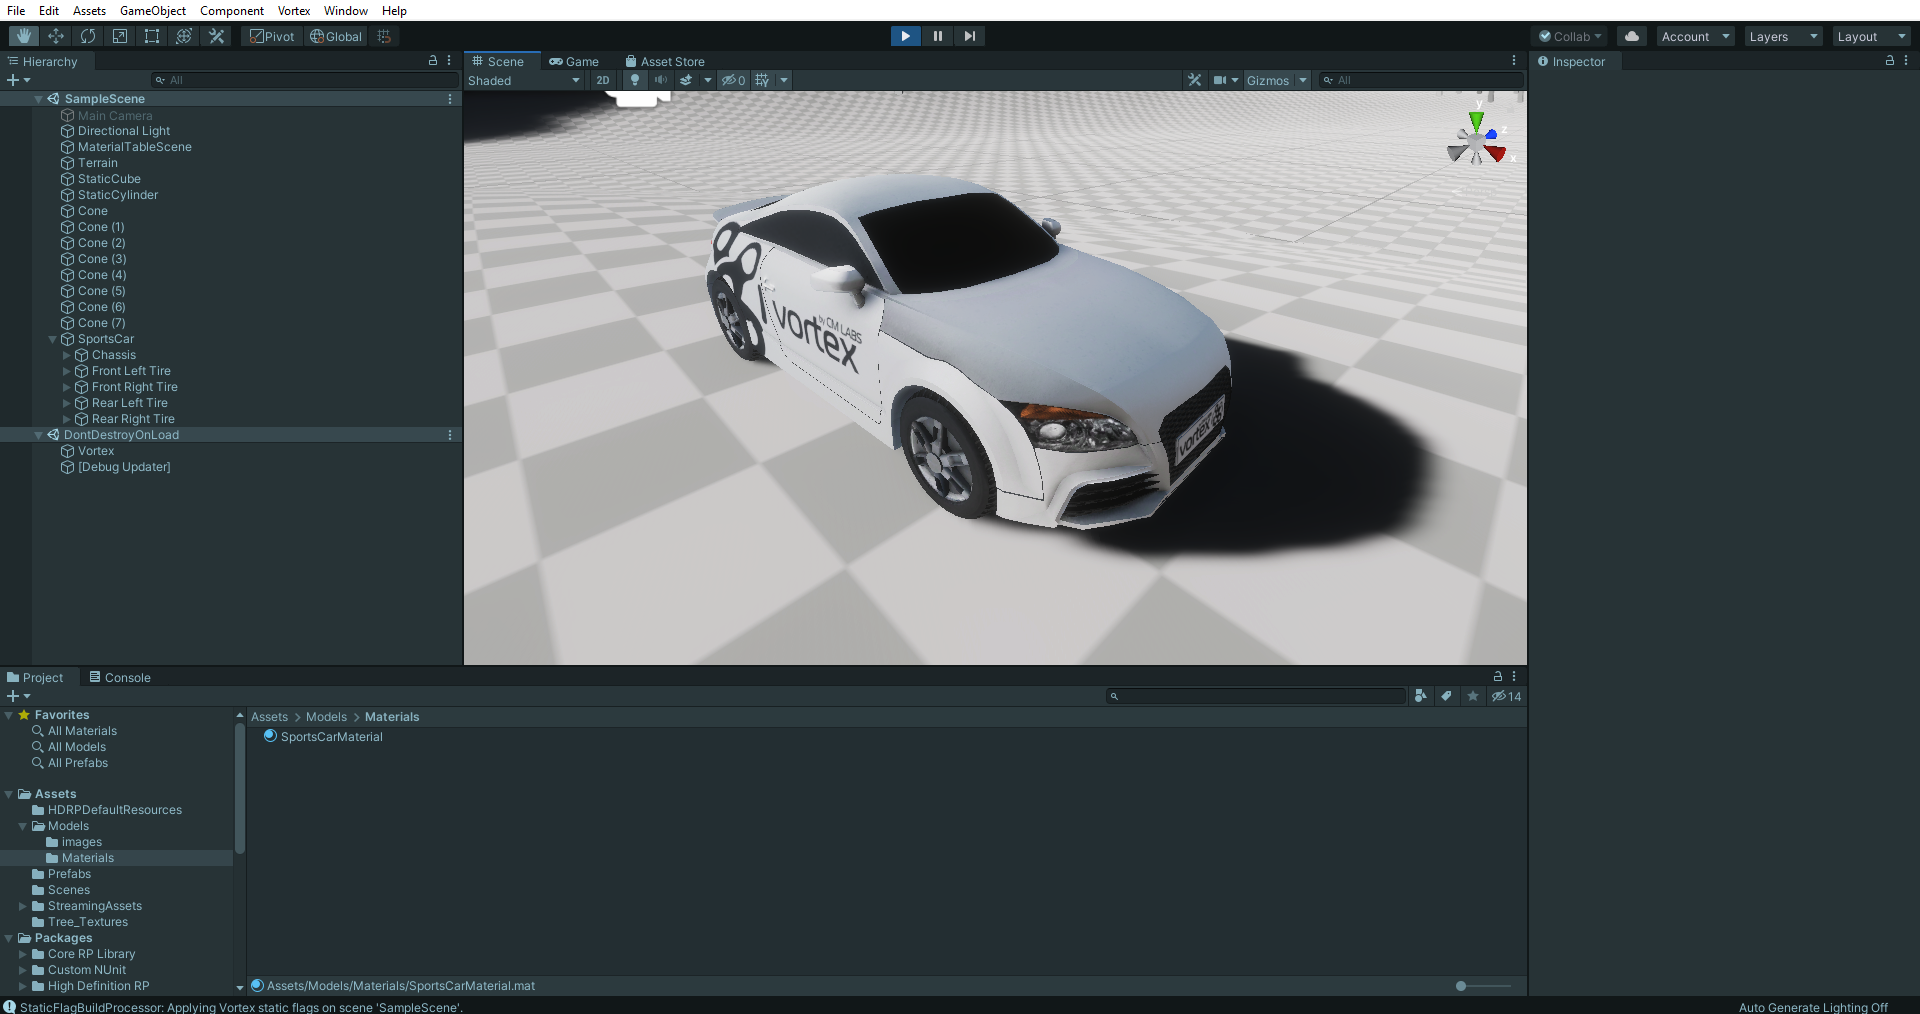
The sample consists of the Vortex Sports Car mechanism that interacts with a Unity terrain with different objects such as static colliders and other simple Vortex mechanisms.
Before opening the project, make sure Vortex Studio 2021a is installed, along with the Vortex Studio Demo Scene 2021a.
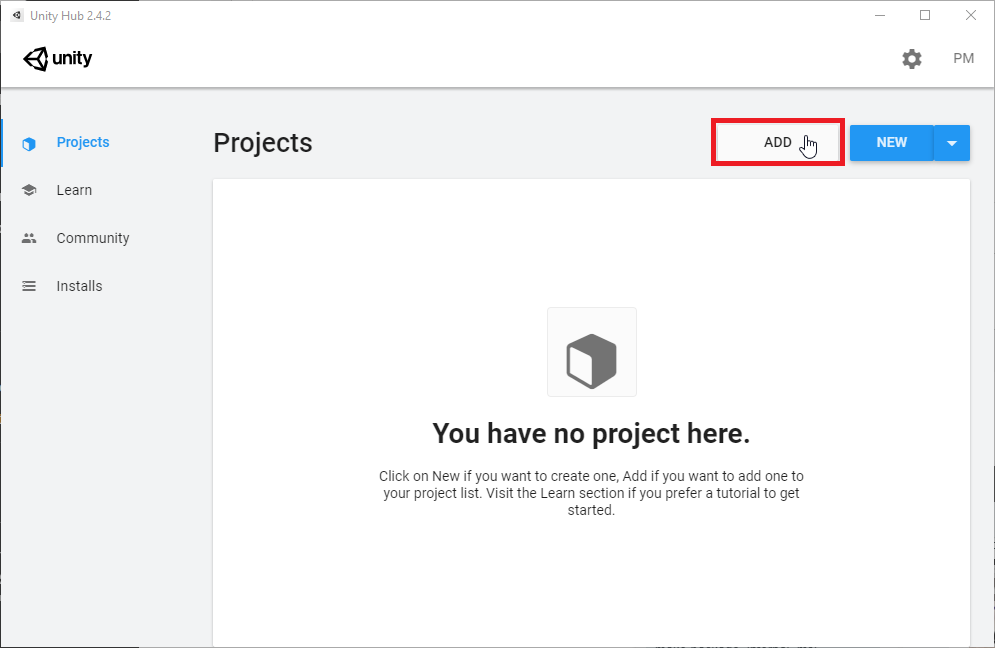
- Open the Unity Hub and click ADD on the Projects tab.
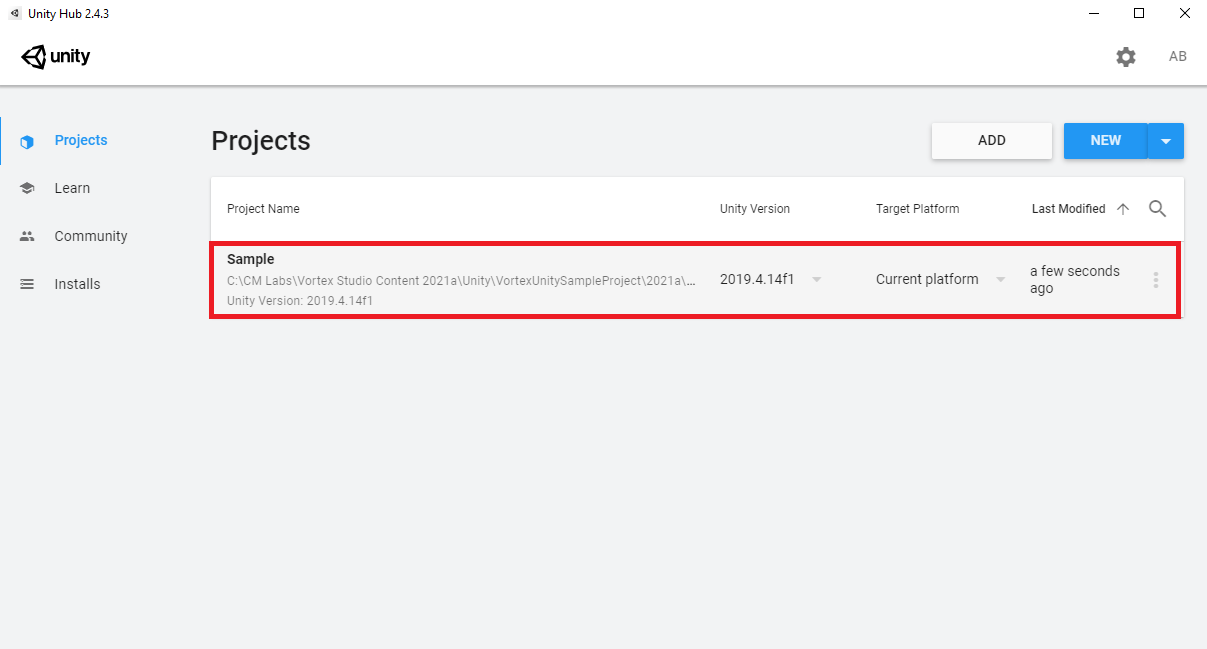
- There is a sample Unity project in the Vortex Demo Scene 2021a package. Navigate to C:\CM Labs\Vortex Studio Content 2021a\Demo Scenes\Unity\VortexUnitySampleProject and add the project to Unity Hub. You can then open the project by clicking it in the list.
Note: By default, the project will use the Vortex Integration package supplied with the Vortex Studio 2021a installation. The package can be found at C:\CM Labs\Vortex Studio 2021a\bin\unity\com.cmlabs.vortex.integration-2021.1.0.tgz. - Hit the Play button and select the SportsCar object to see the current Speed, RPM and Gear in the Inspector window.
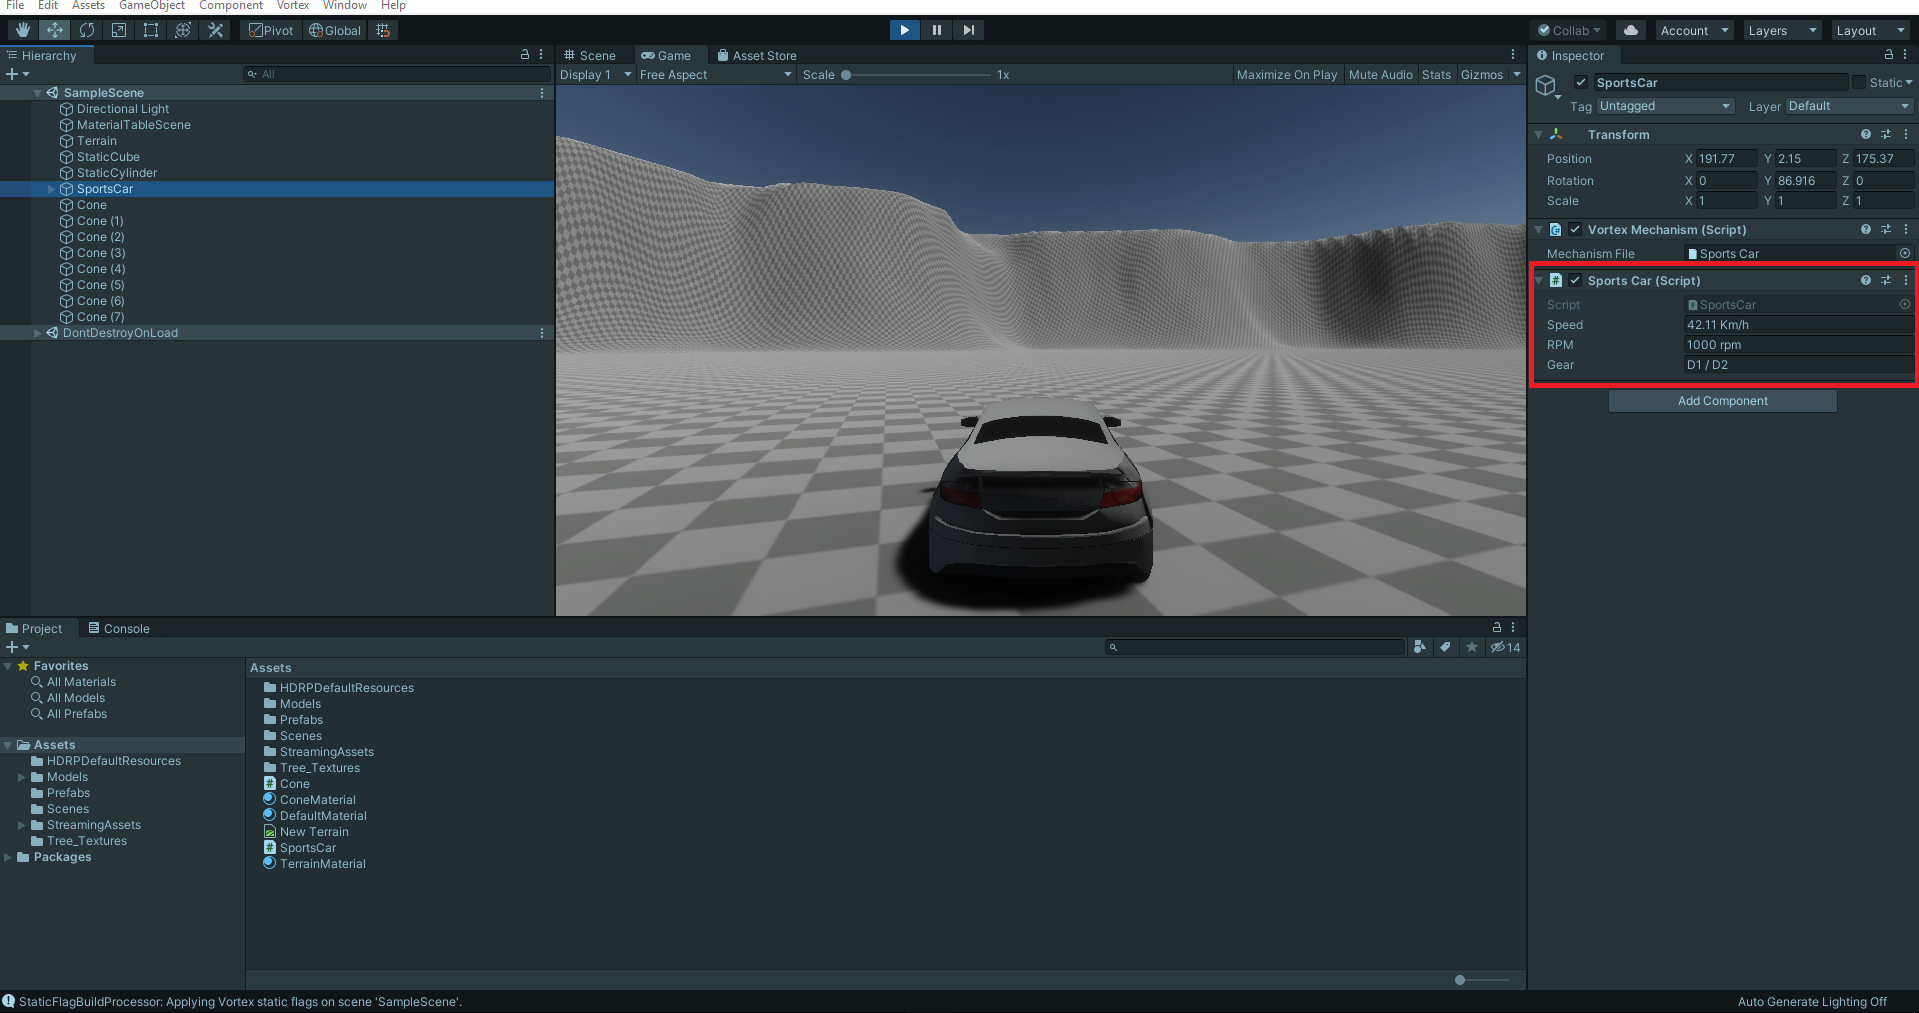
- Be careful, you can hit the orange cones, but not the StaticCylinder object in the middle.
The car can now be driven using a gamepad.
- Have a look at the SportsCar.cs and Cone.cs scripts to see how the mechanisms are integrated into Unity.
Organizing Vortex Studio Documents
This section assumes that you already have a good understanding of Vortex Studio Editor Documents.
The Vortex Studio package lets you import Vortex mechanisms to a Unity project.
To create a valid Unity project using Vortex Studio, you must copy the Vortex documents you want to use in your new Unity project under the Assets/StreamingAssets directory for the project. If the StreamingAssets directory does not exist, create it, since it will be needed when building your Unity application in order to keep all Vortex document files intact. Vortex documents include files with the following formats:
- *.vxmechanism (Mechanism Document)
- *.vxassembly (Assembly Document)
- *.vxgraphicgallery (Graphics Gallery Document)
- *.vxc (Setup Document)
- *.vxmaterials (Material Table)
Example
In this example, you have the following folder hierarchy for the Vortex Sports Car mechanism:
- Sports Car
- Dynamic
- Sports Car.vxmechanism
- Sports Car_Assembly.vxassembly
- Sports Car.vxgraphicgallery
- Dynamic
To build a valid Unity project, you must move the same folder structure to a sub-folder of the Assets/StreamingAssets folder of your Unity project. The structure of your Unity project would appear as follows:
- MyProject
- Assets
- StreamingAssets
- Vortex_Mechanisms
- Sports Car
- Dynamic
- Sports Car.vxmechanism
- Sports Car_Assembly.vxassembly
- Sports Car.vxgraphicgallery
- Dynamic
- Sports Car
- Vortex_Mechanisms
- StreamingAssets
- Packages
- manifest.json
- ProjectSettings
- ...
- ...
- Assets
Creating Your First Project
Bringing your first Vortex Studio project into Unity involves verifying that the package is installed/enabled and verifying settings for the project with the package.
Prerequisites
To use the Vortex Integration package, you must have Vortex Studio 2021a and Unity 2020.3.11f1
As of 2021a, the Vortex Integration tarball package can be found under the bin folder of your Vortex Studio installation folder.
The Vortex package has a dependency on Unity's High Definition Render Pipeline (HDRP) package, so make sure to install it using the Package Manager.
IMPORTANT: You must have a valid Unity user account and license to download the Unity Engine and use it.
To Create a New Unity Project Using the Vortex Studio Package
- Open the Unity Hub.
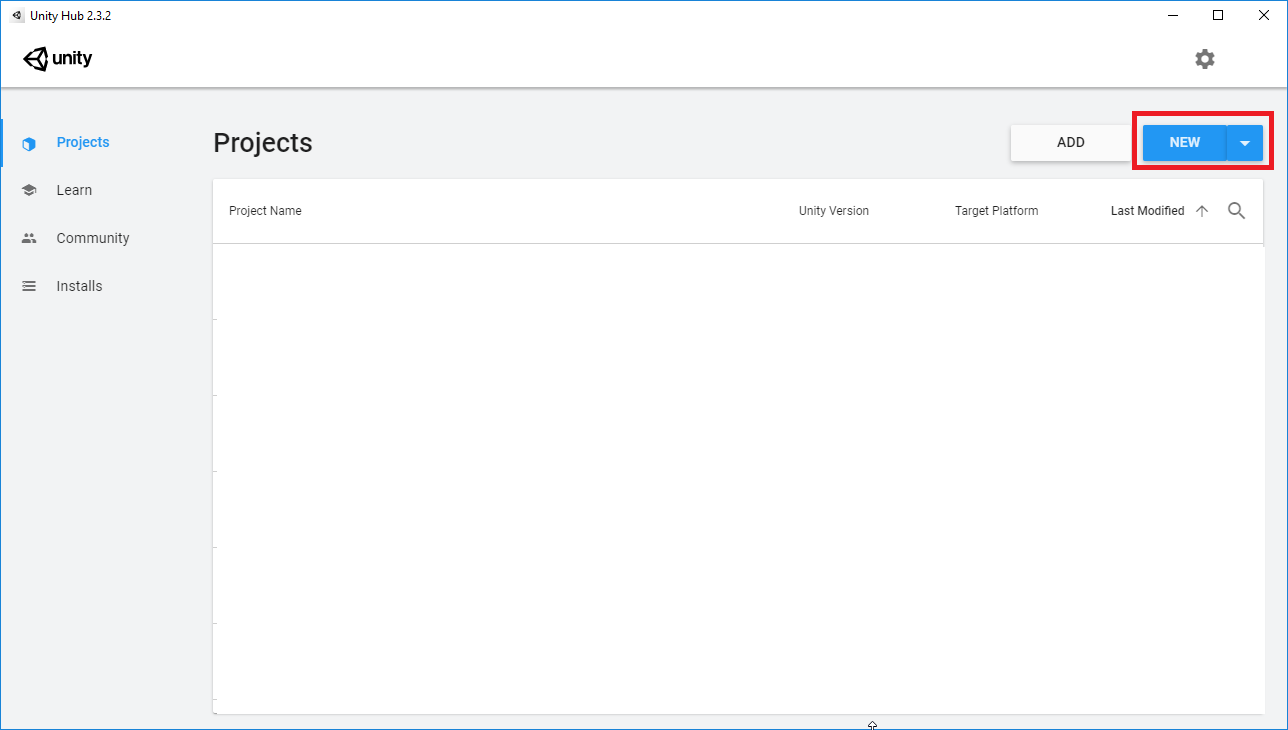
- Click on the the "NEW" button to create a new project.
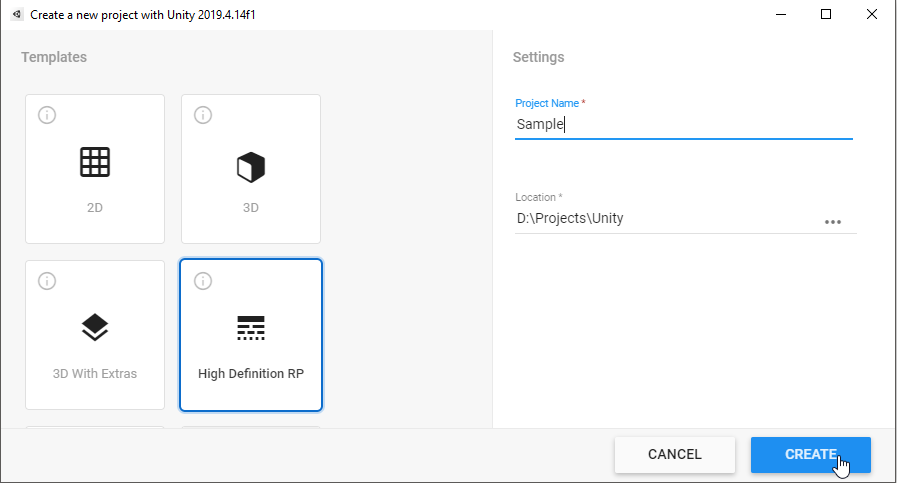
- Select the High Definition RP template and select your project's name and location. Then press on the "CREATE" button to create the project. This will create a project with the HDRP package already set up.
- Next, the Vortex Studio package must be installed in the project. This following page will guide you through its installation: Installing the Vortex Studio Package in a Unity Project.
VortexApplication Component and VxApplication
VortexApplication Component
The VortexApplication Component is automatically added when entering Play mode.
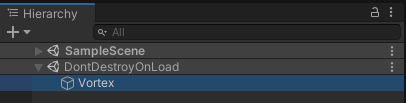
A new GameObject named Vortex with the VortexApplication Component is added to the current scene on Runtime initialization.
The VortexApplication Component is flagged as DontDestroyOnLoad so it will be kept alive on scene transitions.
VxApplication
The VxApplication is only created once when the VortexApplication Component is instantiated.
The VxApplication is destroyed when the application (Game or Unity Editor) exits.
Verifying the Vortex Studio Version
You can verify that the correct version of Vortex is being used by switching to Play mode in the Unity editor and looking at the Console output.

About Vortex Studio Project Settings
You can customize several settings for your project in the Unity Editor from the Vortex Settings window available from the Edit menu.
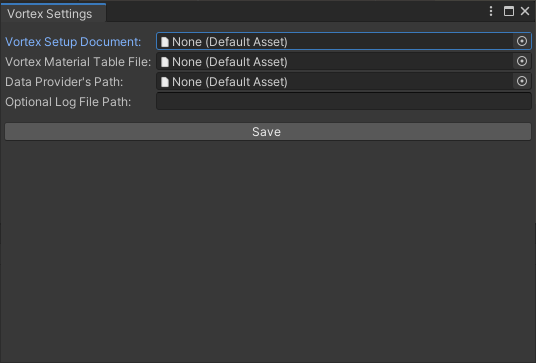
Specifically, you can customize the following settings for your project:
Note
Note
The Vortex Settings are only used inside the Unity Editor.
When running the Unity game, these settings need to be set in a Simulator configuration in the Vortex Director.
| Setting Name | Description |
|---|---|
| Vortex Setup Document | This setting lets you specify a custom Application Setup Document for your Unity project. When set to None, the Vortex Studio simulation in the Unity application uses the default Application Setup Document packaged with Vortex Studio. It is strongly recommended to use the default Application Setup Document for Vortex integrations as a starting point. The default file is under:
Your custom Setup Document must reside under the StreamingAssets folder for the project. It should be under a specific sub-folder, since it will be needed to package this Non-Asset folder when packaging your Unity project. Default: None |
| Vortex Material Table File | This setting lets you specify a custom Material Table for your Unity project. When set to None, the Vortex Studio simulation within Unity will use the default Material Table packaged with Vortex Studio. It is strongly recommended that you use the default Material Table for Vortex Studio integrations as a starting point. The default file is under:
Your custom Material Table must exist under the StreamingAssets folder of your project. Default: None It is a better practice to add a VortexScene component to your Unity Scene, since this is required when running in standalone from the Vortex Director. |
| Data Provider's Path | This setting is for advanced usage. Specifies a path (must be under the StreamingAssets directory of the project) where some simulation data will be stored (for instance, Control Presets). Default: None |
| Optional Log File Path | This setting lets you specify an alternate location and prefix for the Application log file. The default location in the %TEMP% directory is used when this field is empty. Default: None (empty) |
Managing the Frame Rate Between Vortex Studio and Unity
By default, new Unity projects use a fixed frame rate of 50 Hz. The Vortex Studio integration in Unity uses a fixed frame rate of 60 Hz. If you do not change the default settings, the simulation will run at unrealistic speeds.
IMPORTANT: To maintain fidelity and realism in the simulation, you must configure project settings so that Unity and Vortex Studio both use a fixed frame rate.
Example: Setting the Frame Rate in Vortex Studio and the Unity Editor
In this example, you want a simulation to run at 55 Hz.
To set the Frame Rate in the Unity Editor, do the following:
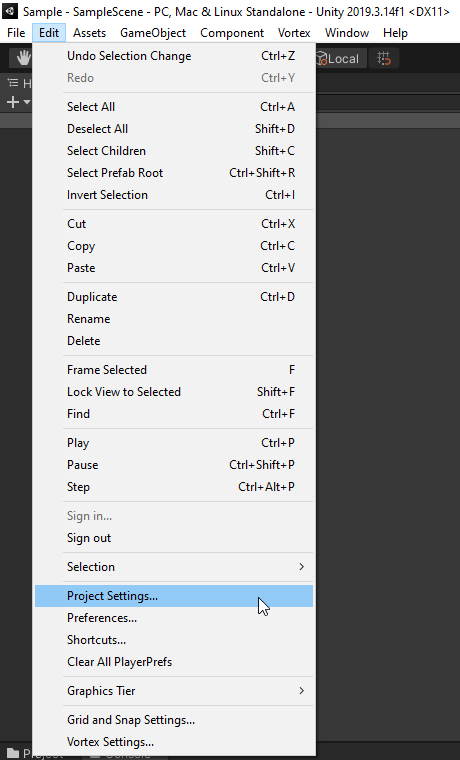
- In the Unity Editor, open your project.
- Click Edit and then click Project Settings...
- In the Project Settings window, click Time.
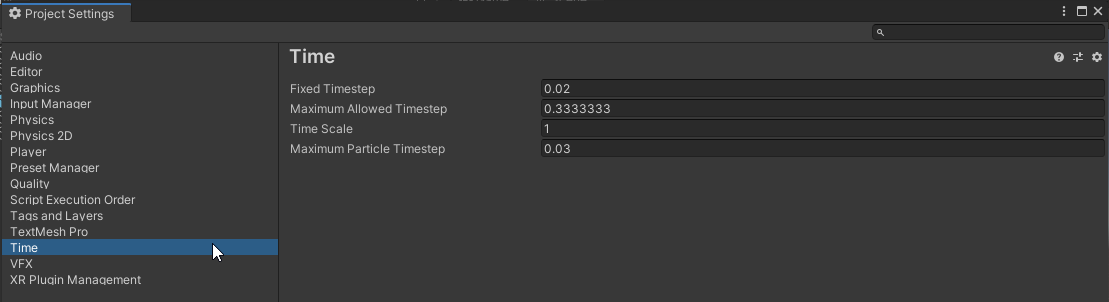
- The Fixed Timestep value is the interval that dictates when physics calculations and FixedUpdate() events are performed.
A value of 0.02 second is 50 Hz (1/0.02 = 50)
The value for a 55 Hz frame rate would be (1/55 = 0.01818182)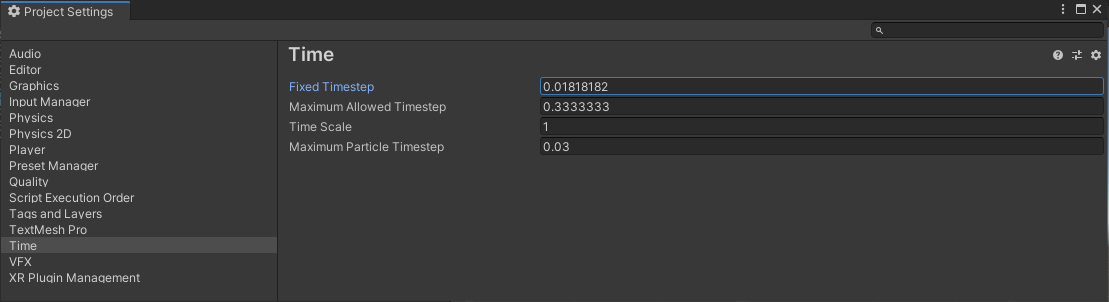
- It is recommended to lower the value of Maximum Allowed Timestep to 2 frames.

- Close the Project Settings window and restart the project.
To set the Frame Rate in the Vortex Studio Editor, do the following:
Prerequisite: You must have a custom Application Setup Document (not the default one provided with Vortex Studio). Make sure the custom application setup document is saved in the Assets/StreamingAssets directory of your Unity project.
- In the Vortex Settings window, select your custom setup as your Vortex Setup Document
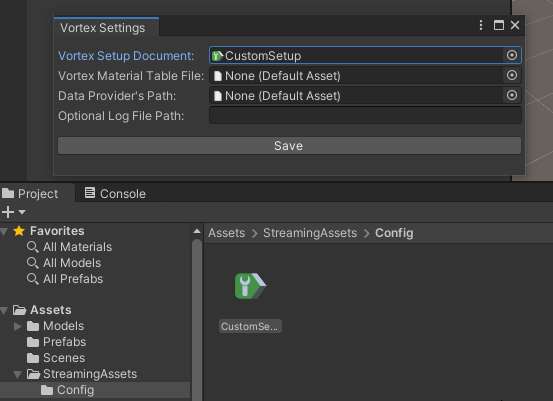
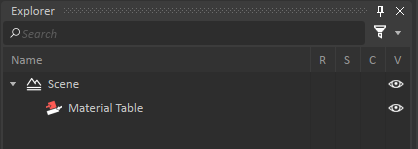
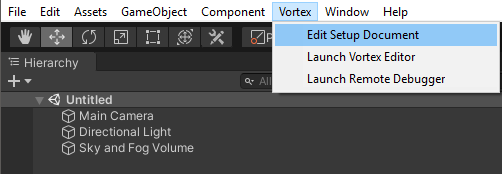
Open your Setup Document in the Vortex Studio Editor.
- In the Explorer panel, click Setup.
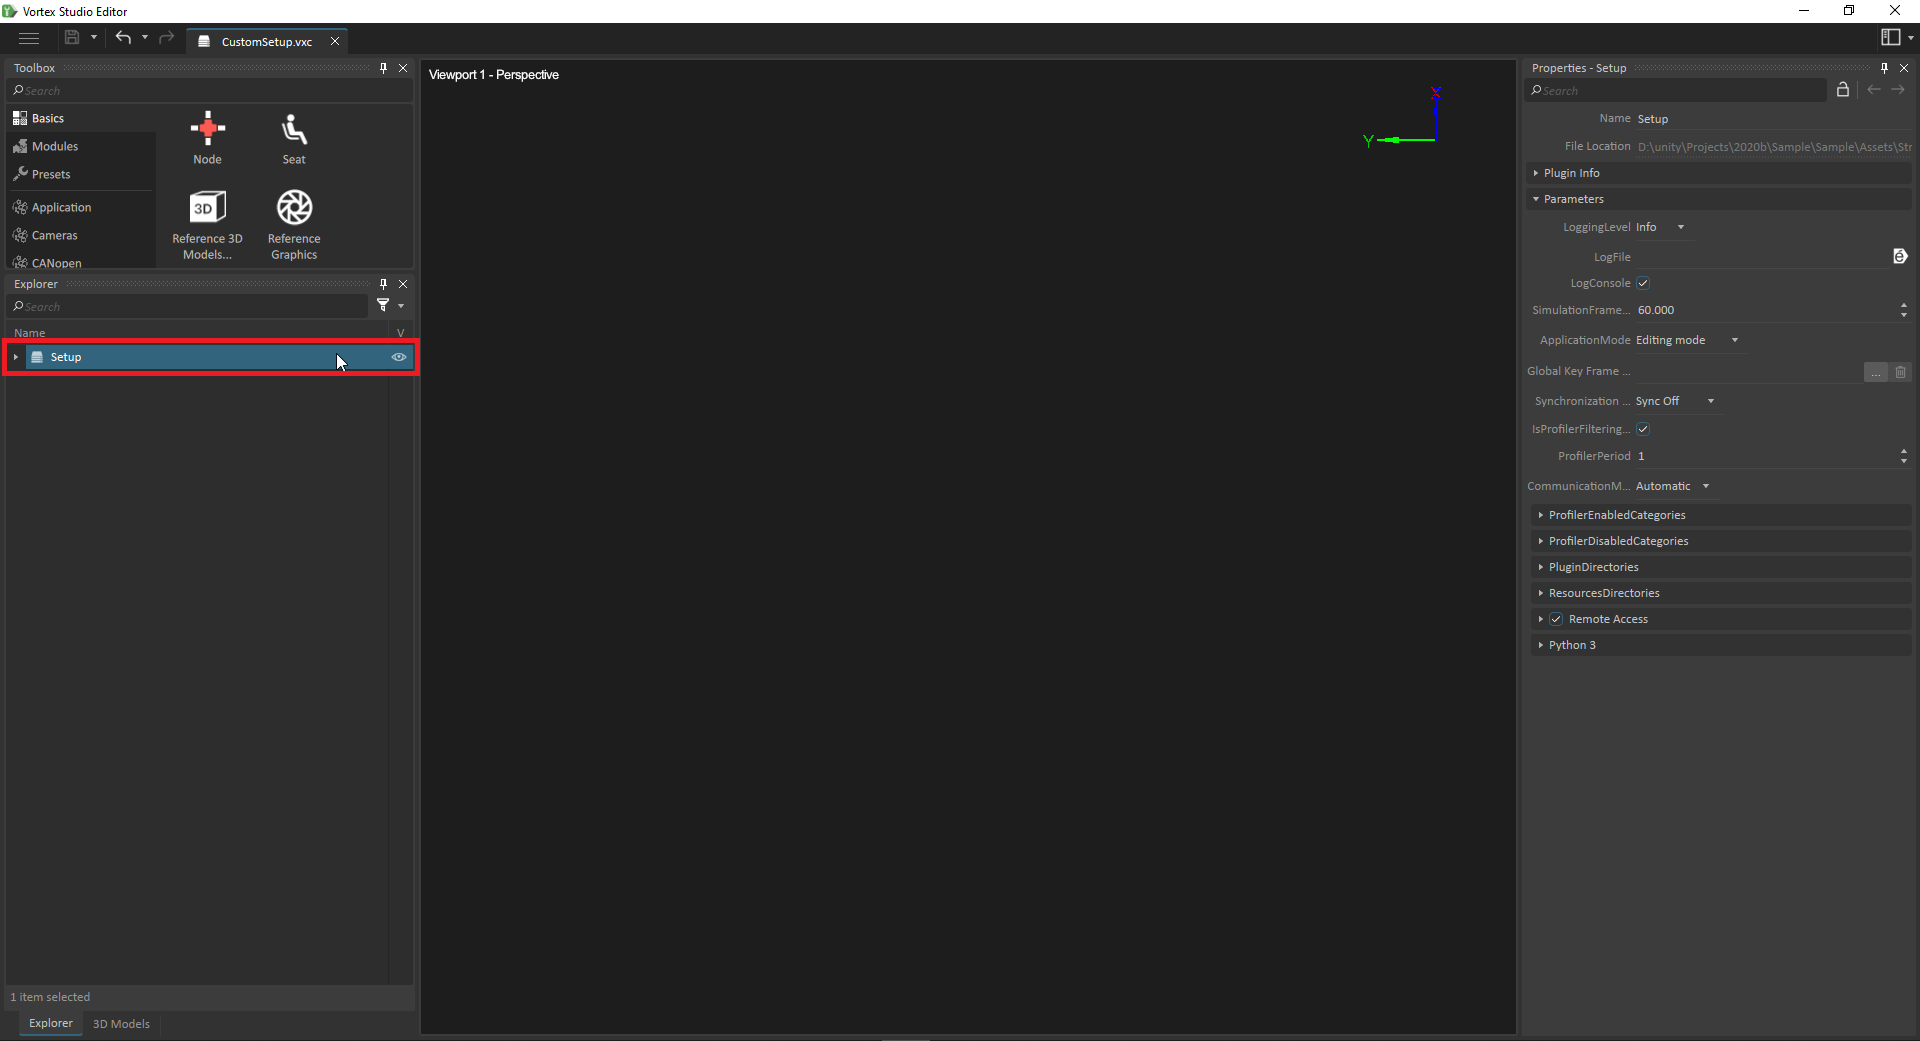
- At the right of the screen, in the Properties panel, set the Simulation Frame Rate value to 55.00.
- To save your changes, click the Save button.

- When you restart the Unity Editor, validate that the settings have been correctly configured.
Using a Vortex Mechanism in Unity
Making the Link Between Your Vortex Mechanism and a Unity Game Object
- See the section Organizing Vortex Studio Assets to place your Vortex content to make it visible to your Unity project.
- In the Inspector of the game object that represents the mechanism in Unity, click on Add Component.
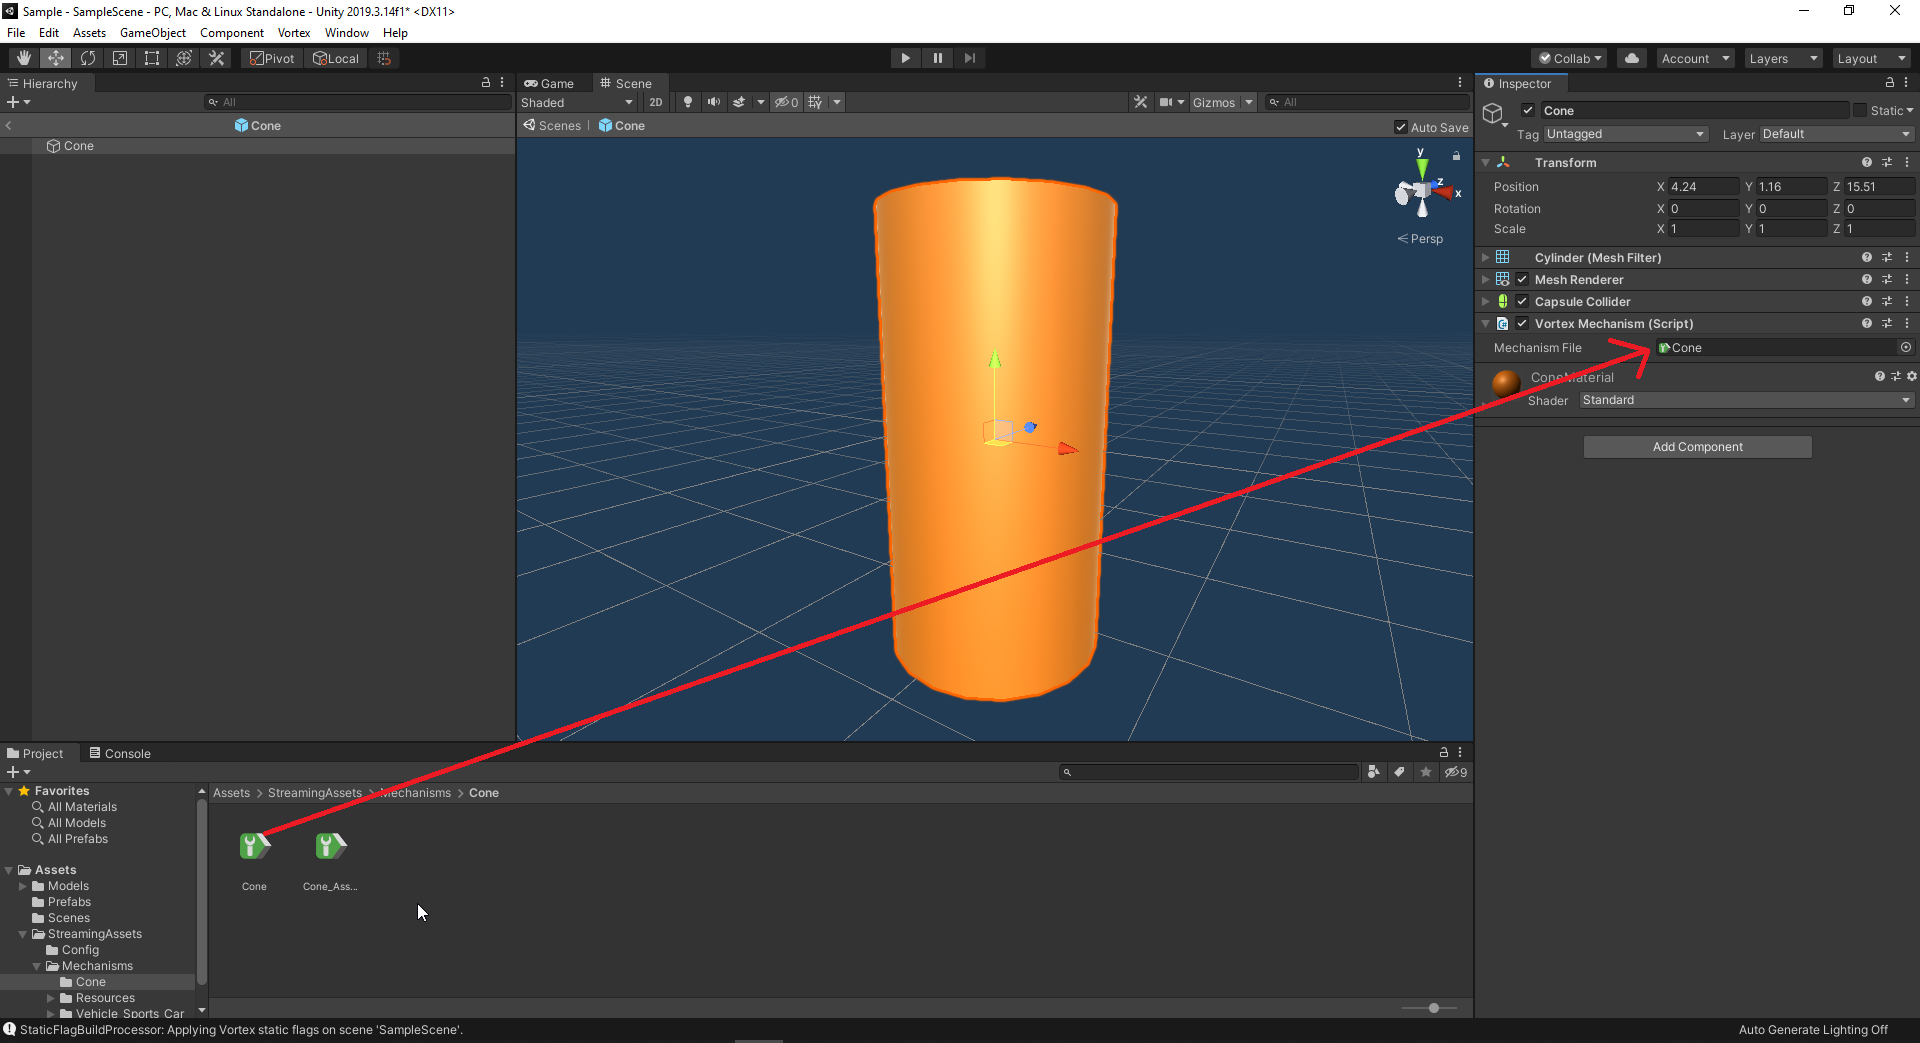
- Select Script → Vortex → Vortex Mechanism.
- Drag your Vortex mechanism file from the Project view to the Mechanism File attribute of the Vortex Mechanism component.
- To access the functions of the Vortex Mechanism component, use or create another C# script on the same game object.
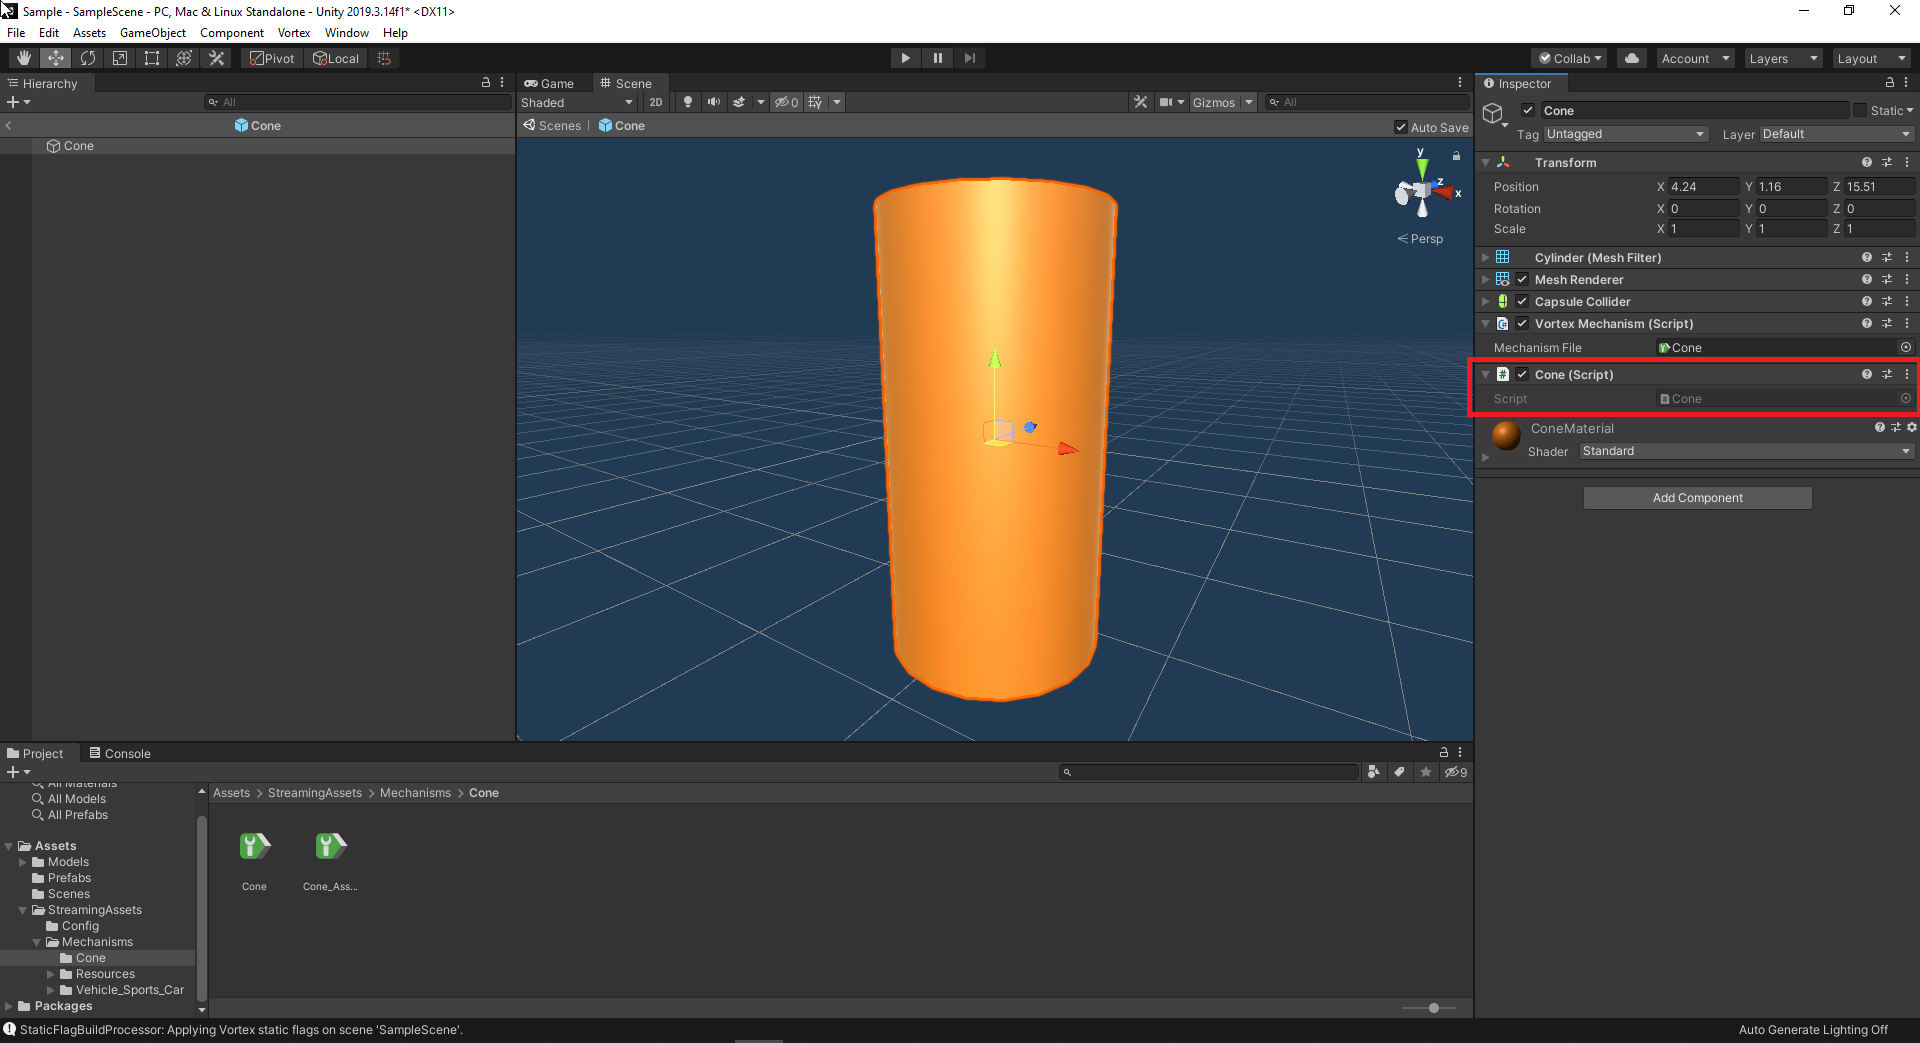
You can easily find another component of the same game object with the GetComponent<> function.
var mechanismComponent = GetComponent<Vortex.VortexMechanism>();
- Once you have access to the VortexMechanism component of your game object, you can access the methods that are part of its public interface.
See the section The Vortex Mechanism Interface for a list of the available methods on the object.
The Vortex Mechanism Interface
Getting the Handle of the Mechanism
In some rare cases, you might need to give Vortex a reference to one of its own mechanisms from Unity. To get a handle which is meaningful to Vortex, use the following method.
Currently, the only use is with the SetInputExtensionPointer method.
public ulong GetMechanismHandle();
Setting/Getting the Value of Fields
The VortexMechanism component exposes many methods to allow you to read and write fields in your Vortex mechanism.
For more information, refer to the section Get/Set Vortex Studio Mechanism Inputs and Outputs (IO).
Other Useful Objects
PositionRotation
The following class is used as the return value of functions like GetOutputMatrix and can easily be applied to the transform of any game object by calling its ApplyOnTransform method.
public class PositionRotation
{
    public Vector3 position;
    public Quaternion rotation;

    public void ApplyOnTransform(Transform t);
}
For example:
using UnityEngine;
using Vortex;

public class MyMechanism : MonoBehaviour
{
	private VortexMechanism mechanismComponent;

	void Start()
	{
		mechanismComponent = GetComponent<VortexMechanism>();
	}

	void FixedUpdate()
	{
		var wt = mechanismComponent.GetOutputMatrix("MyVHL", "World Transform");
		wt.ApplyOnTransform(transform);
	}
}
Get/Set Vortex Studio Mechanism Inputs and Outputs (IO)
The purpose of using VortexMechanism components in your Unity project is not simply to load and unload Vortex mechanisms. It also allows you to get/set Vortex mechanism inputs and outputs (IO) from the Unity game.
Available IO for mechanisms are defined by the following mechanism interfaces:
Outputs from these interfaces can be read from Vortex into the Unity game, while inputs can be set with new values from Unity into Vortex. For this purpose, a set of methods are exposed by the VortexMechanism component.
The following functions are available to you:
| VortexMechanism Component Method | Description |
|---|---|
| From Vortex to Unity | |
bool GetOutputBool(string interfaceName, string outputName) | Search for a specific VHL/Control interface's output field on the target mechanism. This method assumes the desired field is a boolean field and will return its value as a bool. |
double GetOutputReal(string interfaceName, string outputName) | Search for a specific VHL/Control interface's output field on the target mechanism. This method assumes the desired field is a double field and will return its value as a double. |
int GetOutputInt(string interfaceName, string outputName) | Search for a specific VHL/Control interface's output field on the target mechanism. This method assumes the desired field is an integer field and will return its value as a int. |
string GetOutputString(string interfaceName, string outputName) | Search for a specific VHL's output field on the target mechanism. This method assumes the desired field is a string field and will return its value as a String. |
PositionRotation GetOutputMatrix(string interfaceName, string outputName) | Search for a specific VHL's output field on the target mechanism. This method assumes the desired field is a Matrix44 field and will return its value as a PositionRotation object. |
Vector2 GetOutputVector2(string interfaceName, string outputName) | Search for a specific VHL's output field on the target mechanism. This method assumes the desired field is a Vector2 field and will return its value as a Vector2. |
Vector3 GetOutputVector3(string interfaceName, string outputName) | Search for a specific VHL's output field on the target mechanism. This method assumes the desired field is a Vector3 field and will return its value as a Vector3. |
Vector4 GetOutputVector4(string interfaceName, string outputName) | Search for a specific VHL's output field on the target mechanism. This method assumes the desired field is a Vector4 field and will return its value as a Vector4. |
| From Unity to Vortex | |
void SetInputBoolean(string interfaceName, string inputName, bool value) | Search for a specific VHL/Control interface's input field on the target mechanism. This method assumes the desired field is a boolean field and will set its value from a bool. |
void SetInputReal(string interfaceName, string inputName, double value) | Search for a specific VHL/Control interface's input field on the target mechanism. This method assumes the desired field is a double field and will set its value from a double. |
void SetInputInt(string interfaceName, string inputName, int value) | Search for a specific VHL/Control interface's input field on the target mechanism. This method assumes the desired field is an integer field and will set its value from a int. |
void SetInputString(string interfaceName, string inputName, string value) | Search for a specific VHL/Control interface's input field on the target mechanism. This method assumes the desired field is a string field and will set its value from a String. |
void SetInputMatrix(string interfaceName, string inputName, Transform value) | Search for a specific VHL/Control interface's input field on the target mechanism. This method assumes the desired field is a Matrix44 field and will set its value from a Transform. |
void SetInputVector2(string interfaceName, string inputName, Vector2 value) | Search for a specific VHL/Control interface's input field on the target mechanism. This method assumes the desired field is a Vector2 field and will set its value from a Vector2. |
void SetInputVector3(string interfaceName, string inputName, Vector3 value) | Search for a specific VHL/Control interface's input field on the target mechanism. This method assumes the desired field is a Vector3 field and will set its value from a Vector3. |
void SetInputVector4(string interfaceName, string inputName, Vector4 value) | Search for a specific VHL/Control interface's input field on the target mechanism. This method assumes the desired field is a Vector4 field and will set its value from a Vector4. |
void SetInputExtensionPointer(string interfaceName, string inputName, ulong value) | Search for a specific VHL/Control interface's input field on the target mechanism. This method assumes the desired field is an extension pointer and will set its value from a ulong handle. To get the handle of a VortexMechanism component, call the GetMechanismHandle() method on the component. |
In each case, call the method with the name of the interface extension in Vortex and the name of the field in the interface.
For example, in a VHL interface with this name and field in Vortex:
You would write the following code in your C# script:
mechanismComponent.SetInputInt("Engine Interface", "rpm", 4000);
Visualizing the Vortex Simulation for Debugging Purposes Using the Vortex Remote Debugger
It can be useful to use the Vortex Studio Remote Debugger tool to visualize your simulation. The tool lets you inspect collision geometries, contacts, part origins and more, to identify the source of problems.
|
|

Supported Colliding Objects in Unity
Unity supports multiple colliding objects in your simulations, including terrain and static meshes.
Terrain
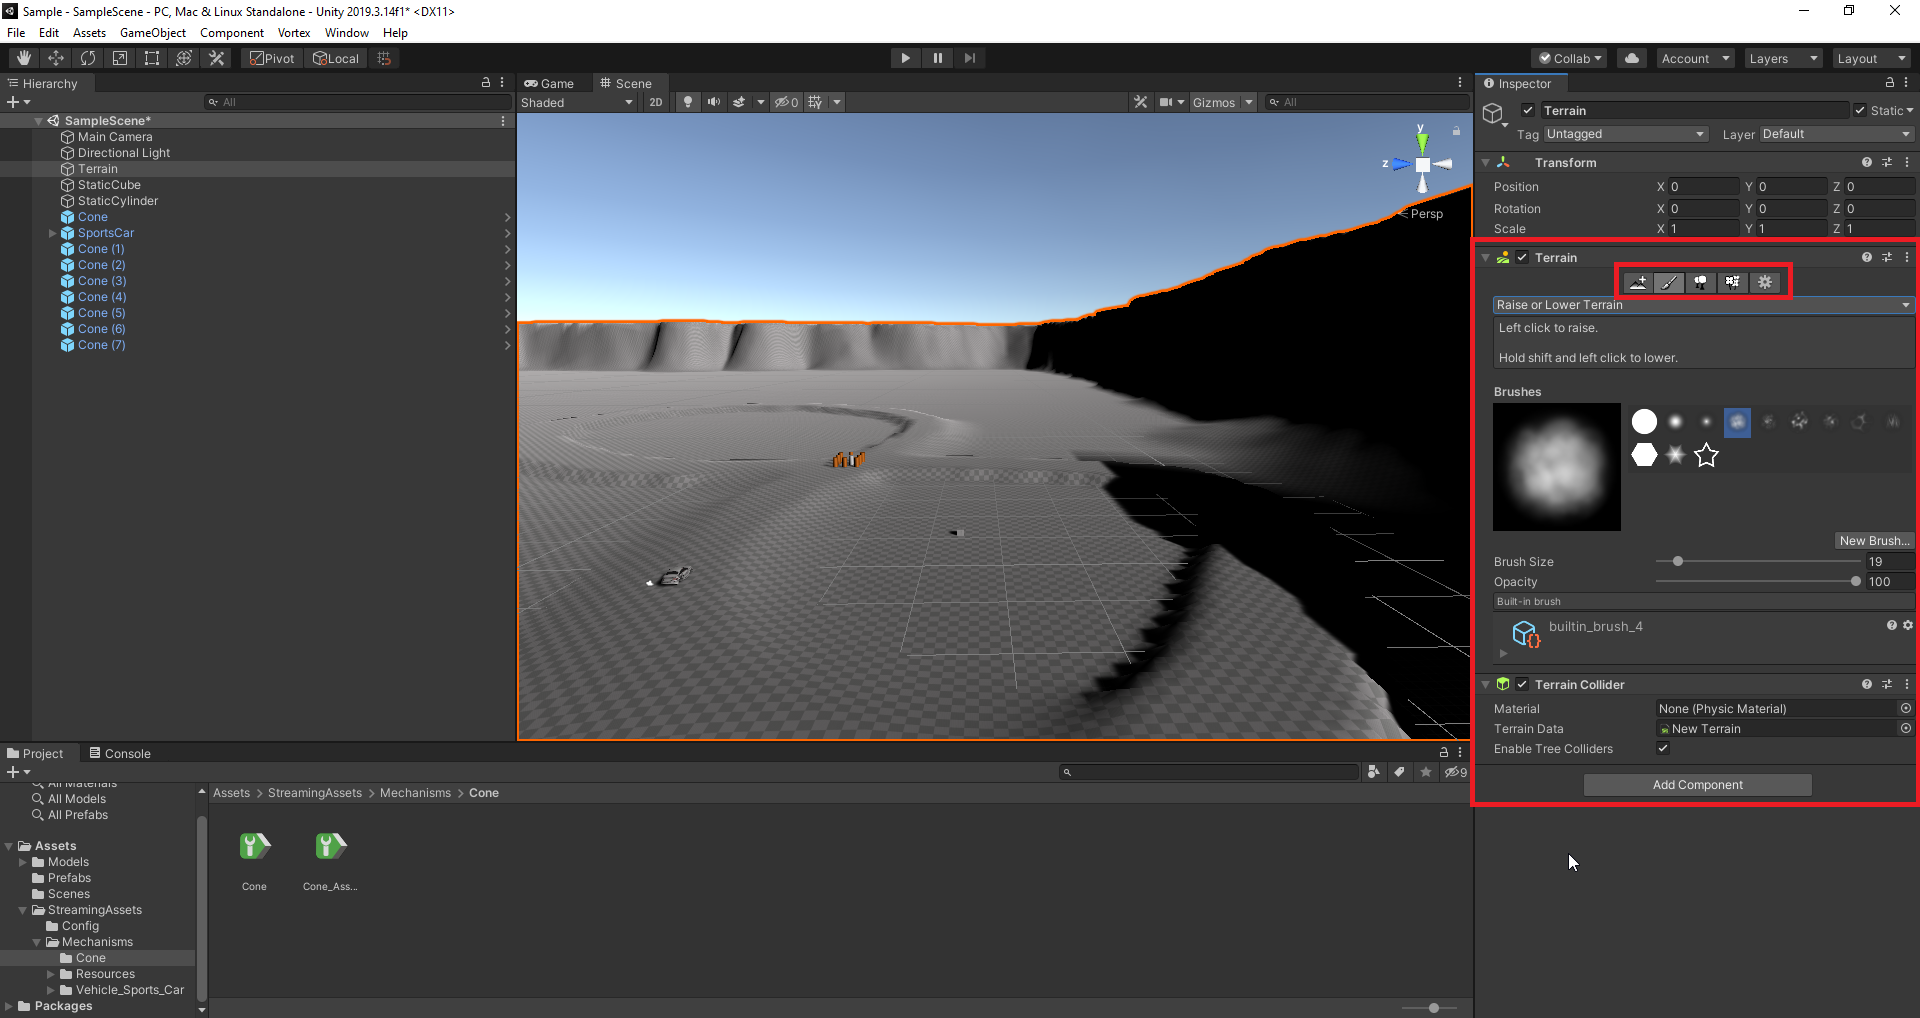
The Terrain is the primary tool to create a terrain in the Unity. This object uses a height map to define elevations of the terrain.
It offers tools to set the elevation and add vegetation.
The following image shows an example of a terrain:
You can inspect any generated height fields in the Vortex world using the Vortex Remote Debugger. The following image shows an example of generated height fields in the Vortex Remote Debugger:

Meshes That Do Not Simulate Physics
With the plugin, the application can generate collisions between a Vortex Mechanism and any Unity mesh that does not simulate physics (static). For example, the system can generate collisions with the following:
- Static mesh colliders
- Static primitive colliders
- Terrain
Mapping Contact Materials
Not fully supported yet.
Every static object in Unity will have the default material in Vortex.
Unity Terrain will have the Ground material in Vortex if the PhysicalMaterial of the collider is set to None.
Build and run the Unity-Vortex application
Build the Unity-Vortex application
- In the Unity Editor, open your scene and go to the Build Settings.
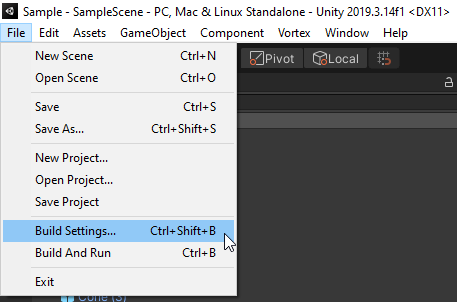
- Add your scene to the build with the Add Open Scenes button.
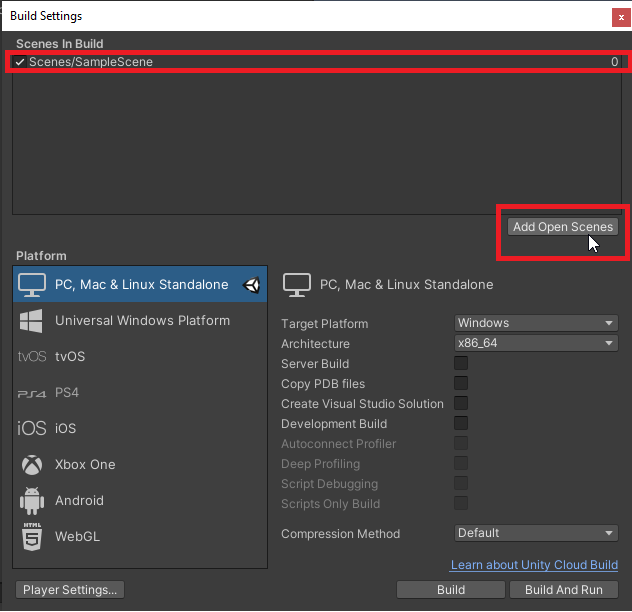
- Make sure the Architecture is set to x86_64.
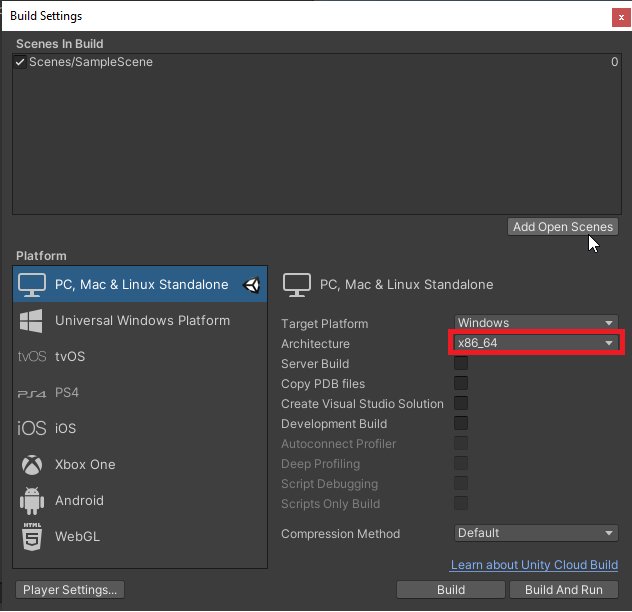
Click the Build button and select the build destination directory.
Note
The Run part of the Build And Run will not work, since the built Unity-Vortex application needs to be launched from the Vortex Director.
Run from the Vortex Studio Director
- Open the Vortex Studio Director and add a simulator to the list.
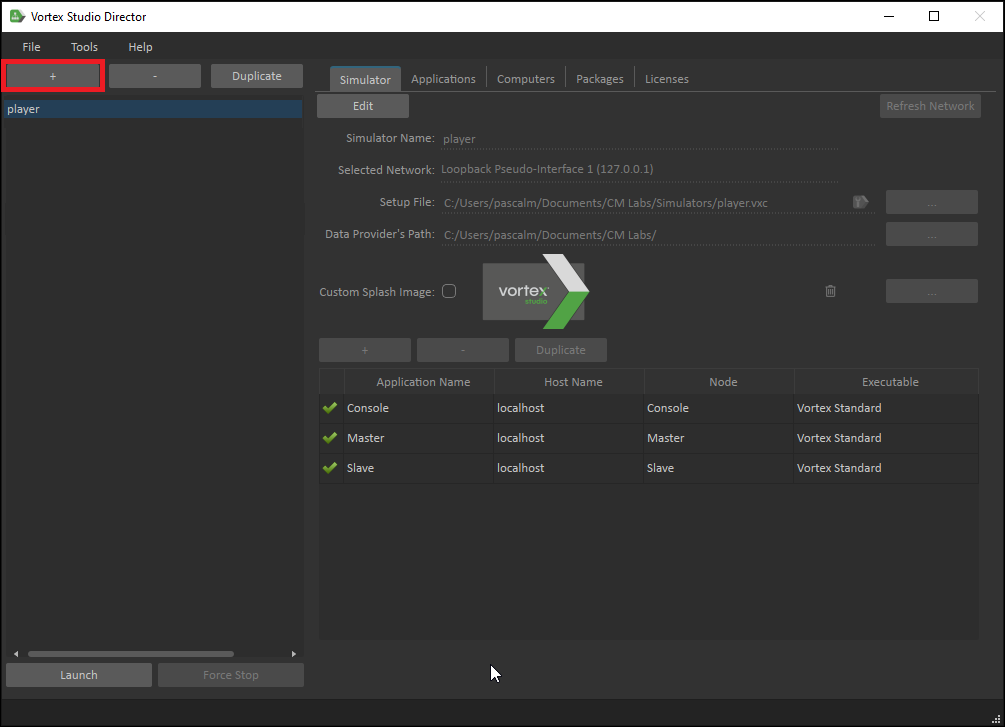
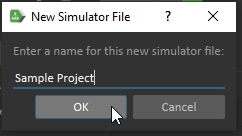
- Name your simulator file and click OK
- Select your Setup file

- Add a simulator node
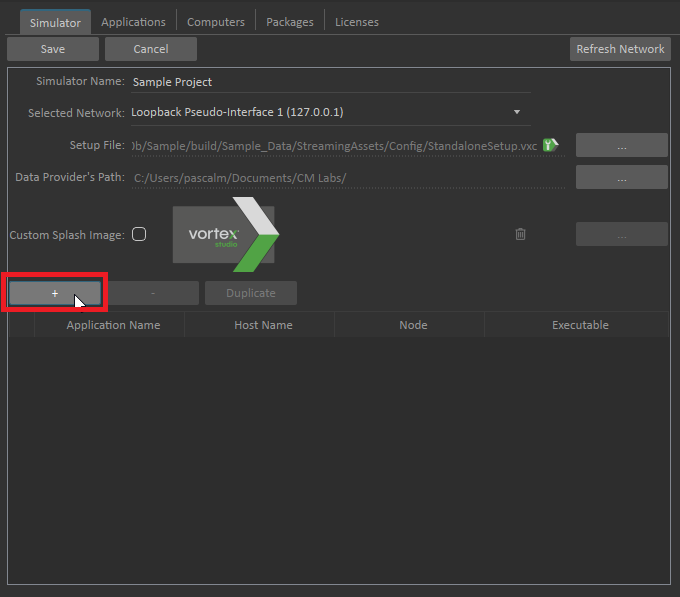
- Select the Node and the Executable (browse to your Unity-Vortex application)
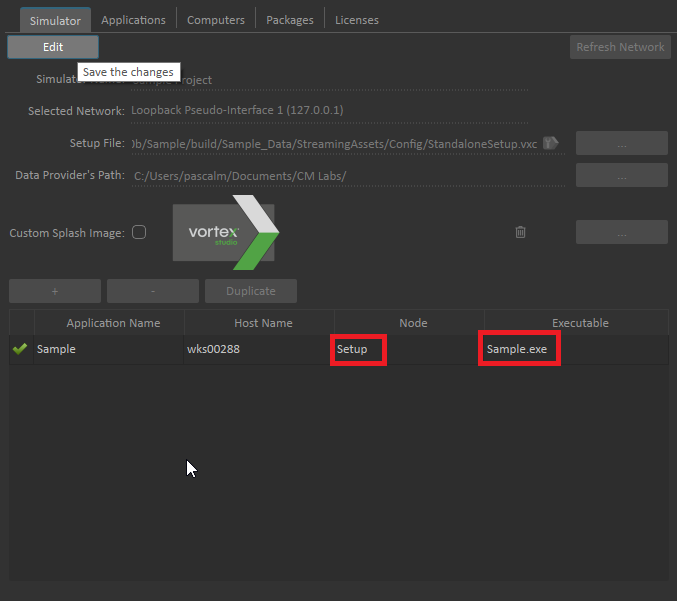
- You can now Save and Launch your simulator.
Limitations
Supported Platform
The Vortex Studio Package for Unity only supports the "Windows (64-bit)" platform.
Simulation time
Vortex and Unity run in the same process; multiple process integration is not yet supported.
When running a fixed frame rate of 60 Hz, the 16 ms time budget is shared between Unity and Vortex.
If the Unity environment is complex and takes 10 ms to render, only 6 ms remain to be used by the Vortex simulation.
MyVortexUnityApp.exe --vortexPath "C:\Any\Path"
To launch this application with the Vortex Director, follow the steps given here and add the command-line arguments at step 6.1.d.