Simulator Deployment Tutorial 1 : Setup File
The Setup File contains configuration information for the Vortex® Studio Editor and for the Player to determine which modules should be loaded and how graphics should be displayed.
This first module doesn't contain step-by-step instructions. Instead, it contains useful information in order to give you context as to how a simulator is configured.
Prerequisites
You need to have Vortex® Studio and the Vortex Studio Demo Scenes installed to be able to follow all steps in this tutorial.
Vortex Studio Editor Setup File
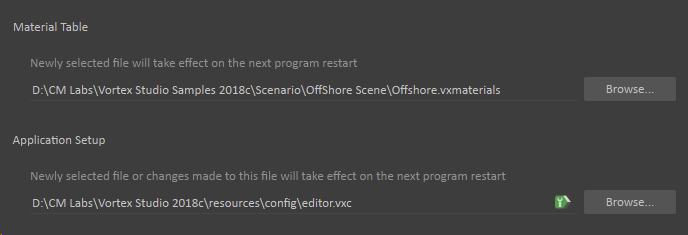
By default, the Vortex Studio Editor loads its configuration file from the following location: C:\CM Labs\Vortex Studio <version>\resources\config\editor.vxc. This configuration file is quite simple, as all it contains is a list of modules that will be available or not in the editor.
Any extension that is related to these modules will be active or inactive based on the presence of these modules in the editor. When you load content containing an extension related to an inactive module, the editor will show the name of this extension in a dark grey color and will also italicize the name of the extension. If you select the extension, all of its fields (inputs, outputs, and parameters will be unavailable). That being said, these inactive extensions can still be used in connection diagrams and they will also be saved with the rest of the content.
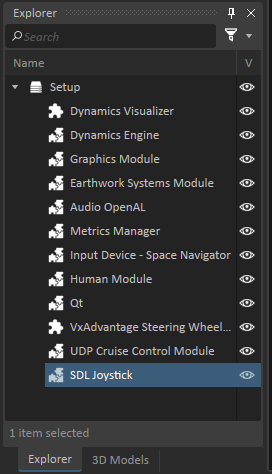
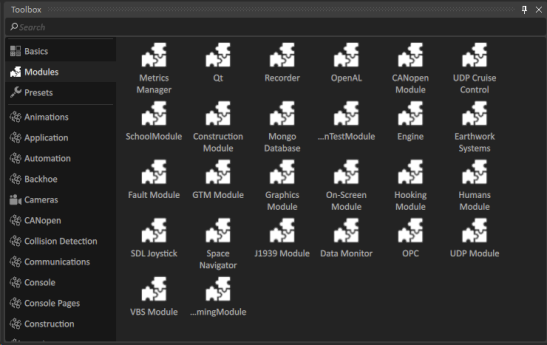
When searching for modules to add to the configuration file, you should be careful to select the module and not its related extensions in the setup editor Toolbox. All Modules can be found in the second entry of the Toolbox, simply labeled Modules.
You can specify a different file in the Options dialog, under the Setup tab.
Vortex Studio Player Setup File
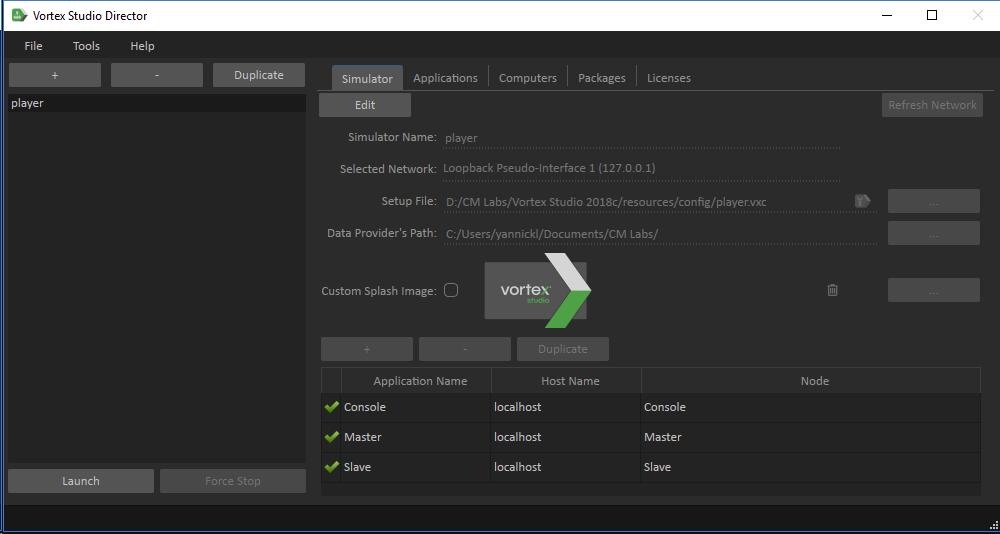
The Player Setup File (C:\CM Labs\Vortex Studio <version>\resources\config\player.vxc) is much more complex than the editor, as it defines the tasks that multiple applications will carry out when users launch the player application. More specifically, launching the player starts three applications on the user's computer:
- Console: An application running the Player Console, where users can select the content to be executed and control the application execution
- Master: An application running the simulation dynamics
- Slave: An application displaying 3D graphics
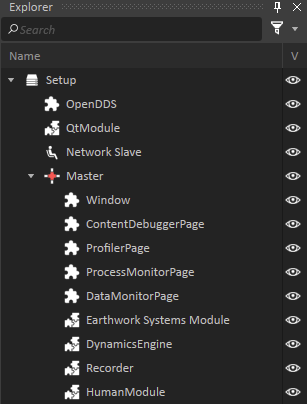
When defining a setup document to launch multiple applications, Nodes are created. Each node can be launched individually, on one computer or across multiple computers. Any modules of configuration elements that are listed outside of the Nodes apply to all of them. Then, all items within each node are specific to that node.
If we look closer to the content of each node, we will see that:
- The Master node contains the DynamicsEngine, along with a number of pages that will appear in a window that will be associated with that application
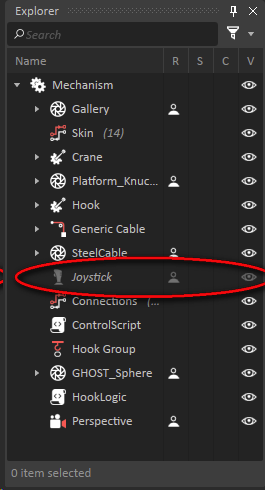
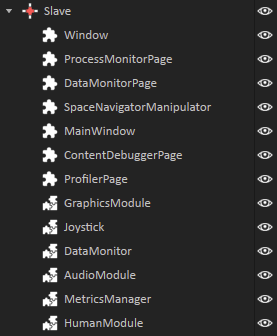
- The Slave node contains two important elements called the MainWindow and GraphicsModule. The combination of these two elements renders the 3D view for the simulation. This node also enabled USB control input with the Joystick module, sound generation with the AudioModule, the ability to display human characters with the HumanModule and support for the SpaceNavigator 3D mouse with the SpaceNavigatorManipulator module.
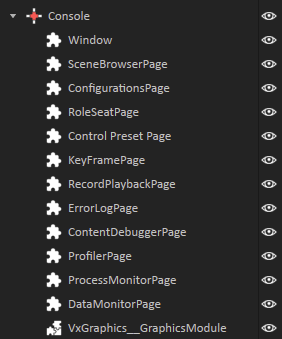
- The Console window only contains user interface elements to allow for selection of content to be loaded and control this content.
If we look at the command that is executed when we launch the player, we will see that we actually launch an application called the VortexDirector in the background with the --launch argument, passing it the path to a file of type vxsimulator.
"C:\CM Labs\Vortex Studio <version>\bin\VortexDirector.exe" --launch "C:\CM Labs\Vortex Studio <version>\\resources\config\player.vxsimulator"
The VortexDirector tool allows users to launch one or more instances of the Vortex Player application, on one or more computers. All instances will automatically communicate with each other and be synchronized when running a simulation. To see the content of the player.vxsimulator file, we can launch the Director tool, then go to its Settings section and browse to the C:\CM Labs\Vortex Studio <version>\resources\config directory. There we will see that the player simulator uses the computer's loopback adapter to launch all three applications.