/
Vegetation Field
Vegetation Field
By DEVOPS
Oct 05, 2021
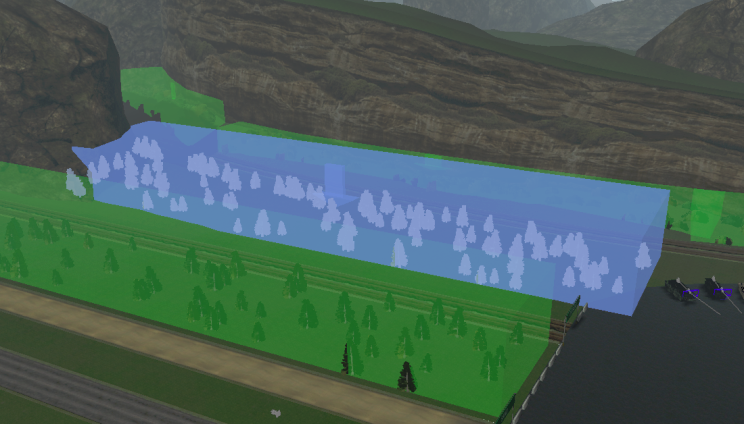 A vegetation field allows you to add elements like rocks, foliage, trees and grass to your scene.
Instead of placing these objects one by one, the vegetation field can randomize and distribute a customizable density of vegetation to a specified area of your scene.
To add a vegetation field:
- Select Environment from the Toolbox, then click Vegetation Field and drag it into the 3D View.
- Specify the following fields in the Properties panel for Vegetation Field.
- Density Mask: In this field, specify a texture to determine the density of the vegetation, as seen from above. Your chosen texture must be black or white or a gray value in between. A fully white texture means that vegetation is distributed randomly all over the vegetation field, and the number of vegetation instances is maximal. A fully black texture means there is no vegetation, its instances are zero. Gray values in between adjust the density according.
- Density: The surface density of the units of vegetation, in units/hectare.
- Seed: This value is used to generate random positions for the vegetation. Using the same value will result in forests that have the same distribution, so using different values for this field will give you unique-looking vegetation fields.
- Dimensions: This is the width, length and height of the vegetation field, in meters.
Terrain Node: Specify the terrain node that you want the vegetation field to follow.
Vegetation fields can only follow flat ground and shallow slopes. Terrain with sharp drop-offs will cause some trees to appear in midair.
- Specify the following fields in the Properties panel for Vegetation Field > Vegetation Field Capture.
- Texture Width and Height: These values control the precision with which the vegetation field follows the terrain. Higher values mean the instances of vegetation will match the terrain more closely, but at greater computational cost.
- Specify the following field in the Properties panel for Vegetation Field > Vegetation Field Sample Tree.
- Render Filename: Specify the Vegetation Library model file used to populate the vegetation field.
- Scale Factor: Specify the factor by which to grow or shrink the vegetation chosen in the Render Filename field.
- You can also add more variation to the vegetation by adding Vegetation Library extensions of Graphics Galleries as children to the vegetation field.
- From the Explorer panel, copy or cut an existing Vegetation Library extension of Graphics Gallery.
- Paste it under the vegetation field.
- Alternatively, drag and drop the extension or Graphics Gallery on the vegetation field in the Explorer panel.
Vortex® will use equal amounts of these children to populate the vegetation.
After adding a Vegetation Field, you may notice a phantom tree at the center. You will only notice it if Geometry is selected, accessed through right-clicking the Vegetation Field's eye icon in the Explorer panel. This is an invisible tree unable to collide with other objects; it exists for internal reference purposes only.
, multiple selections available,
Related content
Vegetation Field
Vegetation Field
More like this
Vegetation Field
Vegetation Field
More like this
Vegetation Field
Vegetation Field
More like this
Vegetation Field
Vegetation Field
More like this
Vegetation Field
Vegetation Field
More like this
Vegetation Field
Vegetation Field
More like this