Sound
- DEVOPS
 You can add sounds to a scene or mechanism to provide audio realism to the simulation.
For example, you could add the sound of a motor being accelerated to a vehicle mechanism.
Sound in Vortex® uses the following components:
You can add audio components to either mechanisms or scenes.
Point Emitter - Setting the Source of the Sound
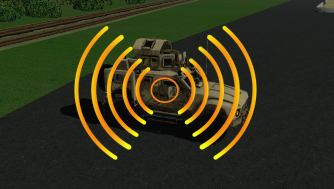
The point emitter allows you to create a sound source and locate its emission point somewhere in the scene.
There is currently no default way to visualize the emitter in the scene.
If you are not already in the Scene or Mechanism editor, either open an existing one or create a new one.
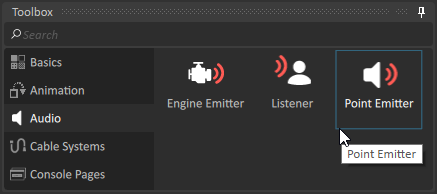
Following the instructions in Adding Extensions, choose the Audio category and then select Point Emitter.
Add the Point Emitter extension to the scene or mechanism.
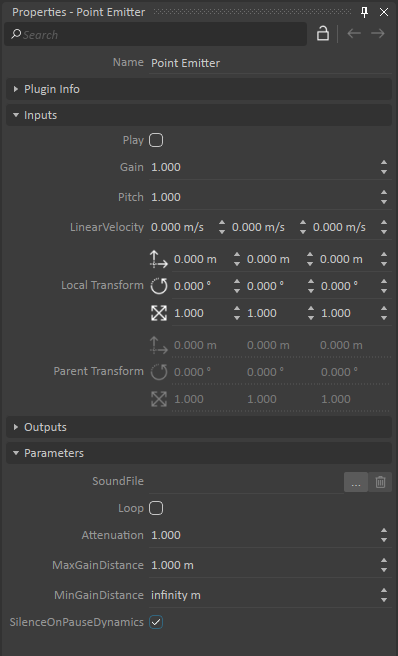
You can modify any of the following inputs:
- Gain: Set the volume of the sound emitted. The default value is
1, which represents the recorded volume;0means no sound.
- Pitch: Set the frequency of the sound emitted based on the recorded pitch. The default value of
1represents the recorded pitch. Higher values increase the pitch. - LinearVelocity: Set the speed of the sound emitter. This information is used to calculate accurate doppler effects.
- Local Transform: Set the position
 of the sound emitter in the simulation. The orientation
 and size
 are not currently used since all sound emitters are spherical sound sources.
- Gain: Set the volume of the sound emitted. The default value is
To specify the sound file to use for the sound effects, click the Browse button in the SoundFile file parameter and select the audio (
*.wav) file you want to use from the browser.Supported formats are audio data in PCM format, either 8- or 16-bit, in either mono or stereo format. Only mono sound files allow correct calculation of sound volume with the location of the listener. Stereo sound files do not have a position, and can be considered ambient sound. Stereo sound file volume does not change with the position of the listener, nor is there any doppler effect.
Enable the Loop option to make the sound play continuously in a loop.
You can modify any of the following parameters:
Attenuation: Define how fast sound attenuates over distance.
Sound attenuation does not work when using stereo tracks. Mono should be used instead.- MaxGainDistance: Set the maximum distance before sound diminishes. Getting closer will not increase the volume.
- MinGainDistance: Set the distance at which the volume is minimum. Getting farther will not decrease the volume.
- SilenceOnPauseDynamics: Enable this option to silence the sound when the simulation is paused.
Engine Emitter - Tuning the Sound to the Engine's RPM
The engine emitter is used to emulate the variations of sounds an engine has depending on its RPM.
It has the same inputs and parameters as the Point Emitter plus a few more that dynamically alter the pitch and the volume of the sound based on the RPM.
If you are not already in the Scene or Mechanism editor, either open an existing one or create a new one.
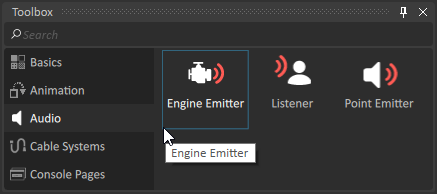
Following the instructions in Adding Extensions, choose the Audio category and then select Engine Emitter.
Add the Engine Emitter extension to the scene or mechanism.
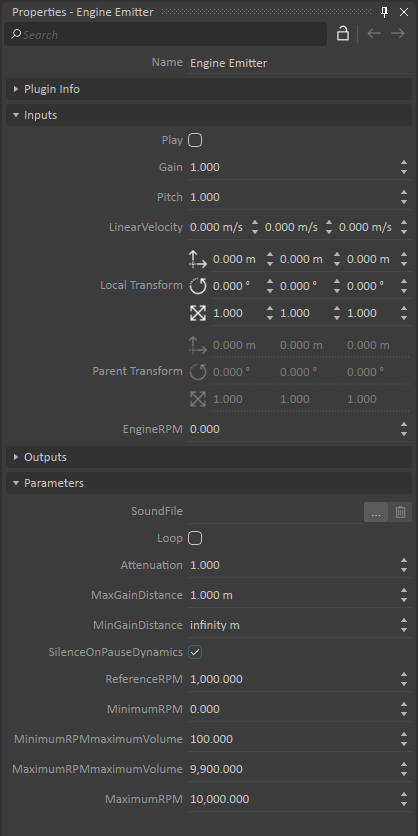
You can modify any of the following inputs:
- Gain: Set the volume of the sound emitted. The default value is
1, which represents the recorded volume;0means no sound.
- Pitch: Set the frequency of the sound emitted based on the recorded pitch. The default value of
1represents the recorded pitch. Higher values increase the pitch.
- Position: Set the position of the sound emitter in the simulation.
- Local Transform: Set the position of the sound emitter in the simulation. The orientation and size
 are not currently used since all sound emitters are spherical sound sources.
- LinearVelocity: Set the speed of the sound emitter. This information is used to calculate accurate Doppler effects.
- Gain: Set the volume of the sound emitted. The default value is
To specify the sound file to use for the sound effects, click the Browse button in the SoundFile file parameter and select the audio (
*.wav) file you want to use from the browser.Supported formats are audio data in PCM format, either 8- or 16-bit, in either mono or stereo format. Only mono sound files allow correct calculation of sound volume with the location of the listener. Stereo sound files do not have a position, and can be considered ambient sound. Stereo sound file volume does not change with the position of the listener, nor is there any Doppler effect.
Enable the Loop option to make the sound play continuously in a loop.
You can modify any of the following parameters:
Attenuation: Define how fast sound attenuates over distance.
Sound attenuation does not work when using stereo tracks. Mono should be used instead.- MaxGainDistance: Set the maximum distance before sound diminishes. Getting closer will not increase the volume.
- MinGainDistance: Set the distance at which the volume is minimum. Getting farther will not decrease the volume.
- SilenceOnPauseDynamics: Enable this option to silence the sound when the simulation is paused.
To customize what happens when the engine reaches a certain RPM, you can set the following:
- EngineRPM: Set the current RPM of the engine. This is used in conjunction with the RPM parameters to modulate the pitch of the sound according to the RPM.
- MinimumRPM: The sound file stops emitting sound when the RPM is lower than the value entered here.
- MinimumRPMmaximumVolume: Set the minimum RPM at which the volume is maximum. The volume then gets gradually weaker until the MinimumRPM is reached.
- MaximumRPMmaximumVolume: Set the maximum RPM at which the volume is maximum. The volume then gets gradually weaker until the MaximumRPM is reached
- MaximumRPM: The sound file stops emitting sound when the RPM is higher than the value entered here.
If you alter the frequency of a file too much, it will sound strange and will not give a good immersion. You may add many sound files recorded at different RPM. Setting the RPM parameters allows you to transition from one sound to the other seamlessly. For example, if you have a sound file at 1000 RPM and one of 2000 RPM you can make them transition like this:
- For a 1000 RPM file: MaximumRPMmaximumVolume=
1500, MaximumRPM=1600 For a 2000 RPM file: MinimumRPMmaximumVolume=
1600, MinimumRPM=1500This way when you reach an RPM 1500 the sound transitions seamlessly between the 2 sound files as the 1000 RMP sound fades gradually until it stops at 1600 while the 2000 RPM sound file's volume increases at the same speed.
Enabling the Listener
The listener has parameters used to locate its position and movement and the volume heard by the listener.
If you are not already in the Scene or Mechanism editor, either open an existing one or create a new one.
Following the instructions in Adding Extensions, choose the Audio category and then select Listener.

Add the Listener extension to the scene or mechanism.
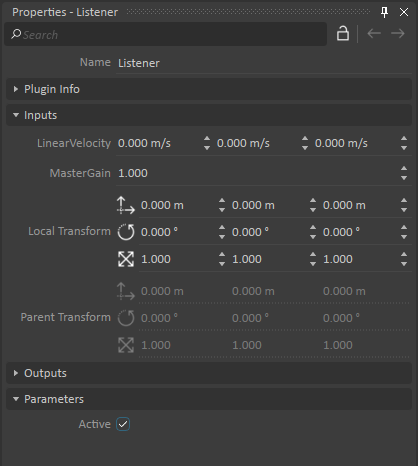
You can modify any of the following:
- Local Transform: Set the position and the orientation of the listener on the simulation.
- LinearVelocity: Set the motion of the listener.
- MasterGain: Set the master volume of sounds heard by the listener. The default value of
1is the recorded volume of sounds (as long as the volume is unmodified by distance in the simulation or the gain value of the sound emitter). - Active: Activate the listener.
- Local Transform: Set the position
Known issues
Under specific circumstances, the sound from an emitter can become garbled. This happens for monaural sound track when the listener and the emitter are moving in tandem while being either too close or aligned vertically. The workaround is keep the sound emitter and the listener separate and make sure they can't be move in a way where they could align with each other.