Sky
- DEVOPS
 Customize the look of the sky in your simulation.
Vortex® Studio Editor allows you to customize the look of the sky and distant environmental backgrounds in the following ways:
SkyBox
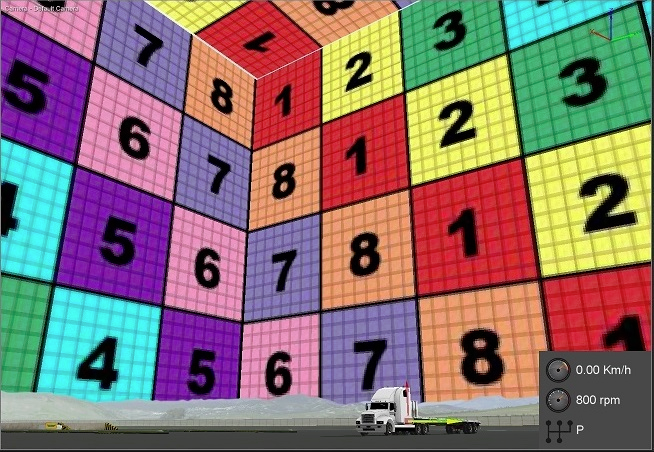
The SkyBox plug-in creates a box around the scene where you can attach an image to each of the inside faces of the box. In this way, you can simulate a setting at a distance by using images rather than modeling buildings, etc.
To add a SkyBox:
- Select Environment in the Toolbox.
- Double-click SkyBox, or click and drag it into the 3D View.
- Edit the name of the SkyBox.
In the Properties panel, configure the following fields:
- Visible: Toggle this box to make the SkyBox visible.
- Cast Shadow: Select this option to have the SkyBox cast shadows.
- Receive Shadow: Select this option to have the SkyBox receive shadows.
- Graphics Material: Use the browse button in this field to select a graphics material to apply to the SkyBox.
- Texture Cube: Use the browse button in this field to select a texture cube to apply texture to the faces of the box.
- Dimension: Enter a new value (in meters) in this field to shrink or expand the SkyBox in relation to the center of the world.
For information concerning the Light Probe Data Generator child extension, see Physically Based Rendering (PBR) Materials.
SkyDome
A SkyDome is a sphere that surrounds the scene used to simulate various environmental factors and time of year. SkyDome adds realistic lighting by internally adding an ambient and directional light.
Note This extension is more feature-complete than the SkyBox extension (which doesn't light the scene) but at the cost of performance. Consider using the SkyBox extension if you do not need time-of-day and weather effects.
To add a SkyDome:
- Select Environment in the Toolbox.
- Click SkyDome and drag it into the 3D View.
- Edit the name of the SkyDome.
- Specify the various environmental inputs and parameters:
- Time: Specifies the year, month, day, hour, minute and seconds of the moment you want the scene to represent. Also, specifies the time zone relative to GMT.
- Clouds: Specifies the amount of cloud cover, the cloud's directional heading (in degrees) and the cloud speed (in meters per second). For information about custom clouds, see Cloud Layer.
- Wind: Specifies the wind's directional heading (in degrees) and the wind's speed (in meters per second).
The frame of reference for the heading is around the global Z-axis. For example, when looking down upon the global Z-axis, zero degrees means the wind comes from the negative Y-axis and moves toward the positive Y-axis. When the heading is set to 270°, the wind starts from the positive X-axis towards the negative X-axis. - SkyDome Refresh Rate: The frequency of the rebuild of the environment map (in number of rebuilds per 60 frames).
- Precipitation: Select the type of precipitation you want in the scene, as well as its heading (in degrees), speed (in meters per second), and intensity. Precipitation is purely for visual effect; it does not change the properties of the surfaces nor does it accumulate on the ground.
The frame of reference for the heading is around the global Z-axis. For example, when looking down upon the global Z-axis, zero degrees means the precipitation comes from the negative Y-axis and moves toward the positive Y-axis. When the heading is set to 270°, the precipitation starts from the positive X-axis towards the negative X-axis. - Fog: Select the check box to turn on fog effects for the scene (see the following fog fields).
- Fog Visibility Distance: The distance (in meters) from the viewer at which an object remains obscured by fog.
- Fog Cutoff Height: The height (in meters) at which the camera is outside the fog.
- Fog Fadeout Length: Specifies the range (along the Z-axis) where the fog fades from 100 to 0% (in meters).
- God Rays: Determines the intensity of the sun ray effect. God rays are also known by the term crepuscular rays.
- Sun Casts Shadows / Moon Cast Shadows: Selecting these boxes allows the light from the sun and moon in the SkyDome to create shadows.
- Ground Color: Sets the color (RGB) and transparency (alpha) of the SkyDome's ground. This input controls the light objects receive from below, used to approximate the light reflected by the ground. Note that the ground color tint also changes with the specified time of day.
The alpha channel controls how much influence the ground color has over the SkyDome. An alpha of zero means the ground will have a default SkyDome color, whereas an alpha of 255 means the SkyDome's ground will be the specified color. - CubeMap Resolution: Specifies the resolution in pixels of the CubeMap.
- Precipitation Clipping Distance: Determines the distance (in meters) from the viewer at which an object is obscured by precipitation.
- Sunlight, Ambient Light, Sky Background, Sun and Moon Billboards, Moonlight: Select these boxes to enable the related effect.
- Location: The latitude, longitude (in degrees) and altitude (in meters) on Earth of the SkyDome. Note that the latitude and longitude's units are in degrees, but minutes are expressed as decimals (e.g., 45° 30' would be entered as 45.5).
For information concerning the Light Probe Data Generator child extension, see Physically Based Rendering (PBR) Materials.
Exposed Settings
Lighting (Sun Diffuse, Ambient, Moon Diffuse), fog, and precipitation settings are determined based on the settings in the SkyDome's Properties panel. However, if you need to adjust these settings for some custom reason, you can do so by expanding the SkyDome in the Explorer panel, exposing additional details about the extension.
For some fields, you will need to open the SkyDome's Connection Editor and sever the connections of the required environmental factors.
Cloud Layer
In conjunction with a SkyDome, you can customize layers of clouds in the sky of your scene.
To add a cloud layer:
- Make sure you have a SkyDome extension in your scene.
- In the SkyDome's Properties panel, set Cloud Cover to Custom.
- Right-click the SkyDome in the Explorer panel.
- Select Add Custom Cloud.
- Select the Custom Cloud Layer under the SkyDome in the Explorer panel.
- Edit the name of the cloud layer in the Name field of its Properties panel.
- Specify the various environmental inputs:
- Visible: Toggles whether the cloud layer is visible.
- Custom Cloud Type: Specifies the type of cloud from a drop-down list.
- Layer Infinite: Toggles whether to override the layer size, and infinitely extends the cloud layer.
- Layer Position: Specifies the X and Y position of the cloud layer in the sky.
- Layer Size: Specifies the length and width of the cloud layer.
- Layer Altitude: Specifies how high in the sky the cloud layer appears.
- Layer Transparency: Specifies the alpha value used to blend the cloud layer with the sky and sun.