Asset Browser
The Asset Browser is shown in Vortex Editor Home page where it is used to open any Vortex document for edition.
It can also be shown in any opened document, using by selecting the Asset Browser in the panels menu , to insert content in the opened document.
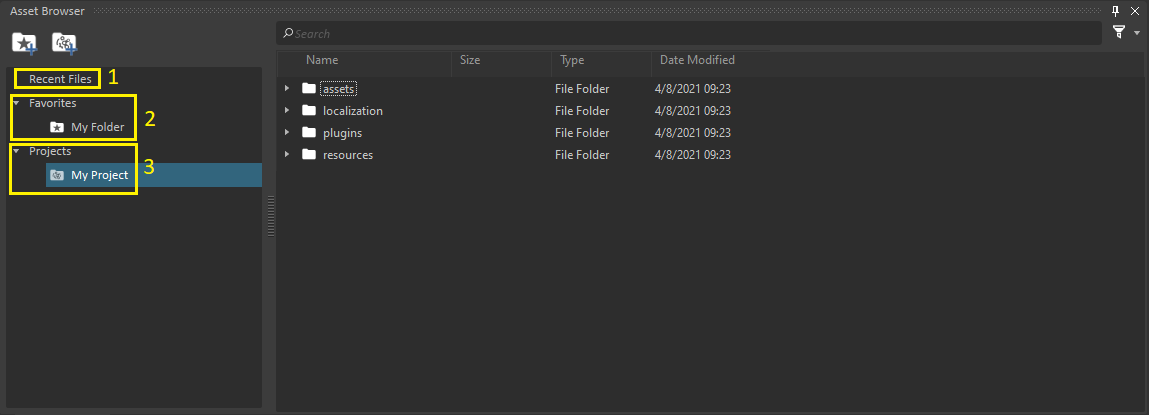
The left side of the Browser shows the following 3 sections:
- Recent Files: When selected, the Browser will show a list of all recently opened files inside the right pane.
- Favorites: This contains a list of shortcuts to favorite folders, that were added using the "Add Favorite..." button
 at the top-left.
When selecting any of these folders (identified with a star icon ), the right pane will show the folder hierarchy of the favorite.
 - Projects: Contains a list of shortcuts to project folders, whose role is to help organizing content files.
They are added by using the "Add Project..." button at the top-left.
When selecting any of these folders (identified with the CM Labs logo ), the right pane will show the folder hierarchy and files contained in it.
Favorites and projects can be removed by pressing the Delete key when an item is selected.
A Project helps organize the various files necessary when creating a simulator.
A Project contains 4 specialized folders that are created under its root if they don't already exist:
- assets: Folder for asset files such as mechanisms, scenes, scripts, etc.
- resources: Folder for simulator configuration files, such as setup files, simulator files, and other resource files.
- plugins: Folder for user plugins
- localization: Folder for localization files.
A search box at the top of the file list allows you to search for file names matching the criteria you enter.
A filter button at the top right corner of the file list allows you to select the specific types of Vortex Studio Editor files to display in the list.
You can right-click a search result and select Open Containing Folder in order to go directly to that file's location in the folder hierarchy.
Only Vortex files relevant for content creation appear in the Asset Browser.
Adding Documents to Your Simulation
Several methods are available when interacting with files from the Asset Browser to your simulation: right-click, double-click, and drag and drop.
Right-clicking on a file will open a context menu with choices relevant to the file type, e.g. Open File, Open Containing Folder.
Double-clicking on a file in the file list on the right opens that file in a new Vortex Studio Editor document (if not already open), and switches to that tab.
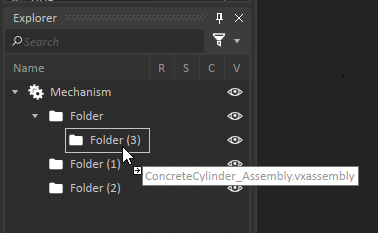
Drag and drop allows you to insert a file's document into the currently active document. For example, you can quickly add an assembly to a mechanism by selecting the assembly in the Asset Browser's file list and dragging it either into the mechanism's Explorer panel or into its 3D View.
As mentioned above, there are two options for dropping a dragged content file: the 3D View and the Explorer panel.
- When dragging a compatible file into the 3D View, a green position indicator is displayed, helping you visualize where to drop the asset.

- When dragging a compatible file into the Explorer panel, depending on your organizational needs, you can choose to drop it onto the root object or any folder within the root object.
- Dragging a file to either an incompatible 3D View or Explorer panel results in an incompatibility icon.

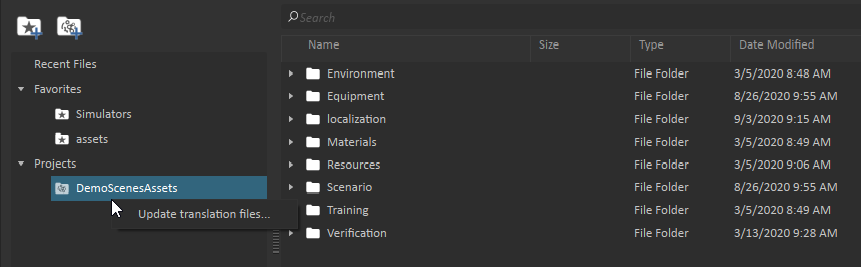
Localizing a Project
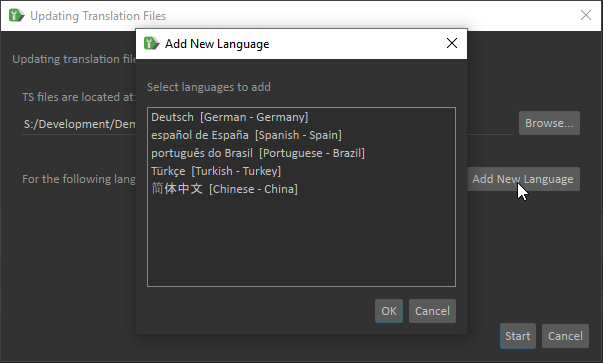
Simply right-click on the Project in the Asset Browser and select "Update translation files"
The Updating Translation Files dialog shows where the existing *.ts translation files are located. If this is the first time the *.ts files are being created for the Project, the default location is the 'localization' folder under the Project directory.
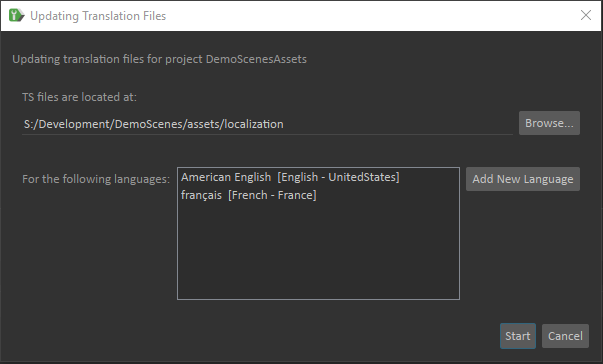
You can choose a different folder using the ![]() button. The selected folder must always be under the 'assets' folder of the Project so that the translation files can be found at runtime.
button. The selected folder must always be under the 'assets' folder of the Project so that the translation files can be found at runtime.
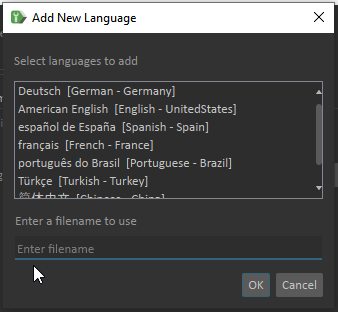
The languages list in the dialog shows the languages for which *.ts files have already been created. Use the Add New Language button to select language(s) for adding new *.ts files. You will need to select languages if no *.ts files are present in the selected location.
The list of languages you can add includes
- English
- French
- German
- Spanish
- Portuguese
- Turkish and
- Chinese.
You can select one or multiple languages from the Add New Language list.
If this is the first time you are creating translation files for your project, you will need to enter a filename that will be used as a base name for the files. This option is shown only when no *.ts files are present in the specified location.
![]()
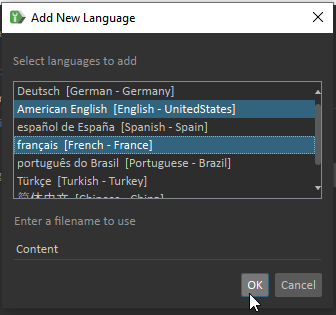
When the language(s) are selected and a filename is entered (if applicable), press OK to confirm your selection.
Now that the TS files location and languages list are set up, press the Start button to update and/or generate the translation files.
Both *.ts (source) and *.qm (binary) files will be populated for each of the selected languages, based on the content files in the Project. The *.ts files can be sent to a translation service to have the correct words and phrases added. When the files have been translated, replace them in the localization folder and run "Update translation files" again to update the associated *.qm files.
Using user plugins
When compiling your own plugins, copy them in the plugins folder and setup your simulation to use them.